In HelpEcho, managing support ticket categories helps you stay organized and route issues effectively. Follow the steps below to create and manage your categories.
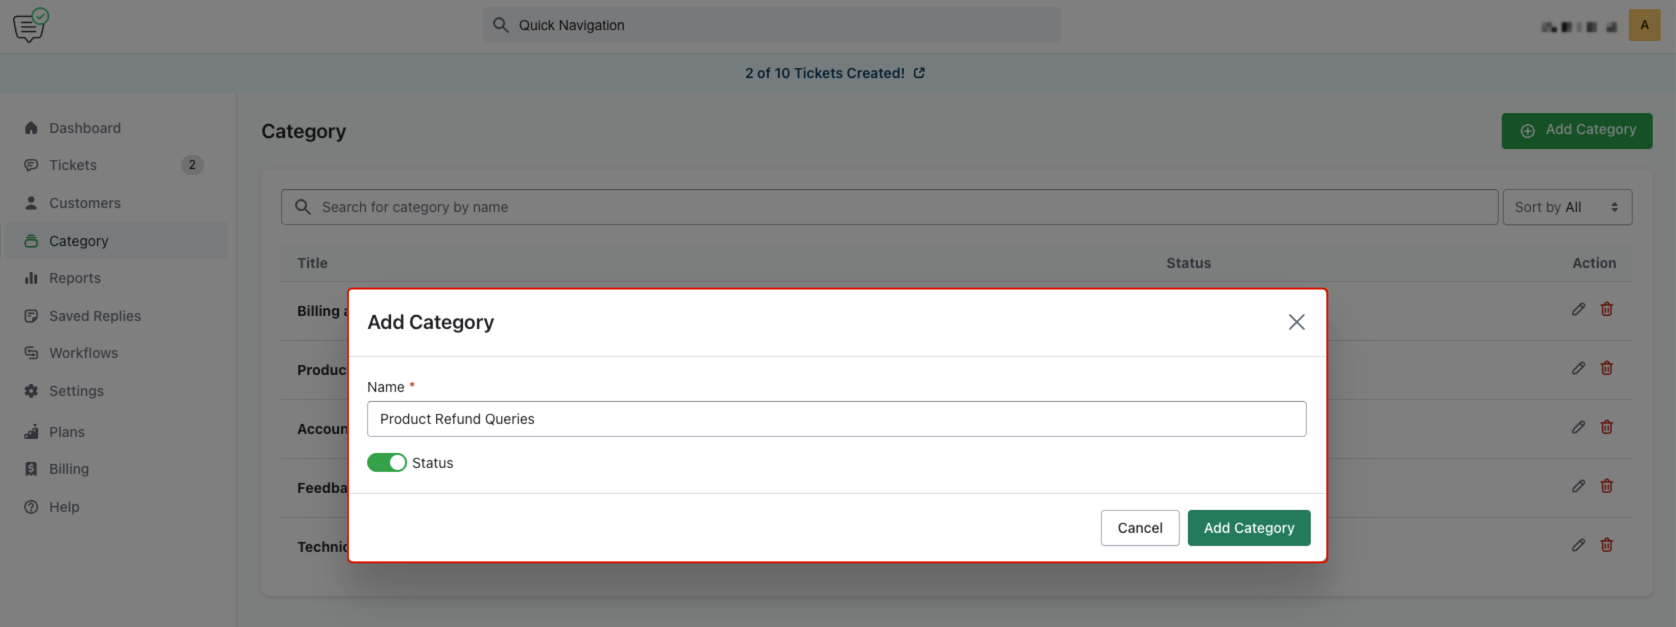
Step 1: Add a New Category
To add a new category:
- Go to the Category section from the left sidebar.
- Click the Add Category button.
- In the popup form, enter the category Name.
- Toggle the Status to enable or disable the category.
- Click Add Category to save it.
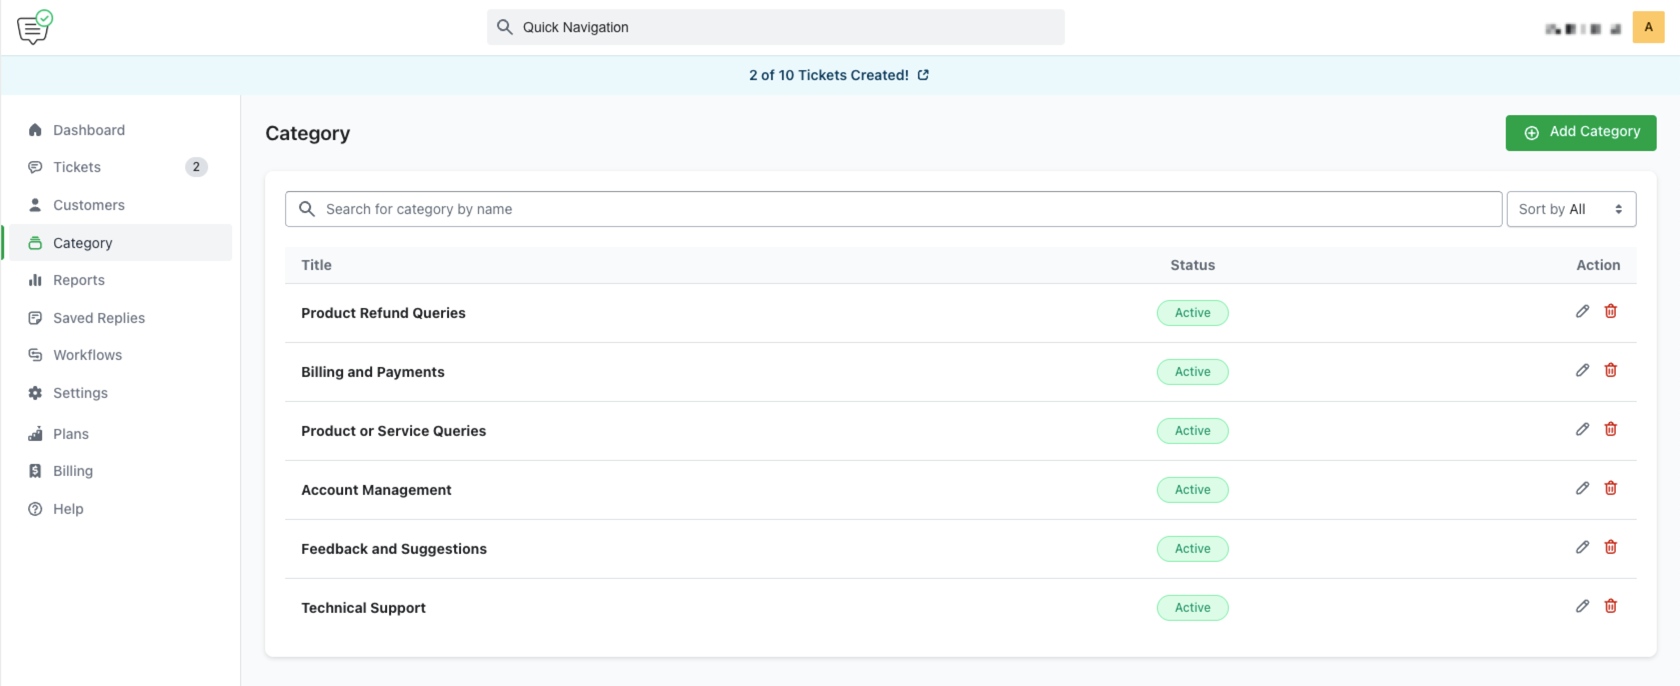
Step 2: View the Category List
Once created, all your categories will appear in a table.
The table displays:
- Title (name of the category)
- Status (Active/Inactive)
- Actions: Edit or Delete icons
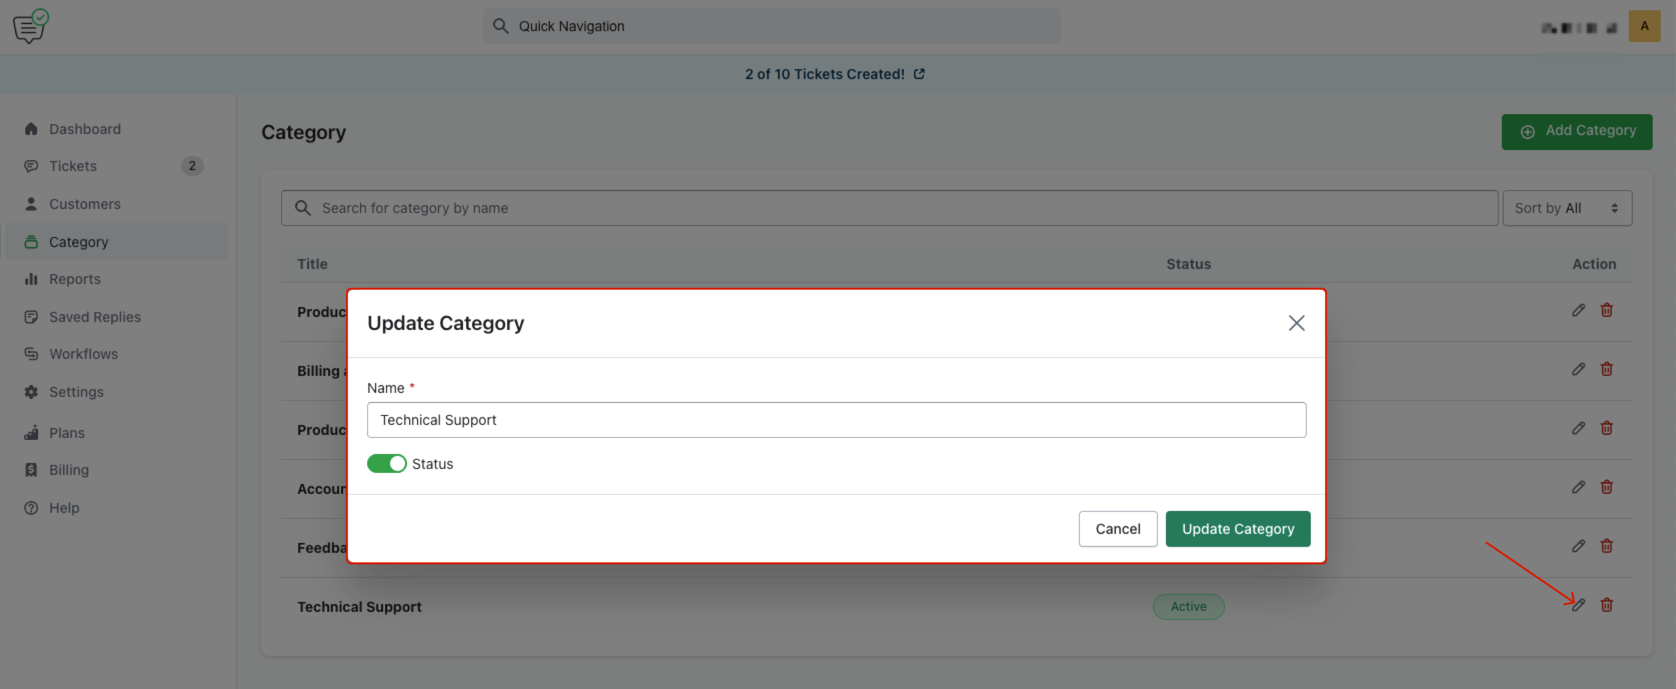
Step 3: Edit a Category
To make changes to a category:
- Click the Edit (pencil) icon next to the category.
- Update the Name and toggle Status if needed.
- Click Update Category to save changes.
Step 4: Search and Sort Categories by Status
You can search for a specific category by typing its name in the search box.
To filter by status:
- Use the dropdown to sort by All, Active, or Inactive.
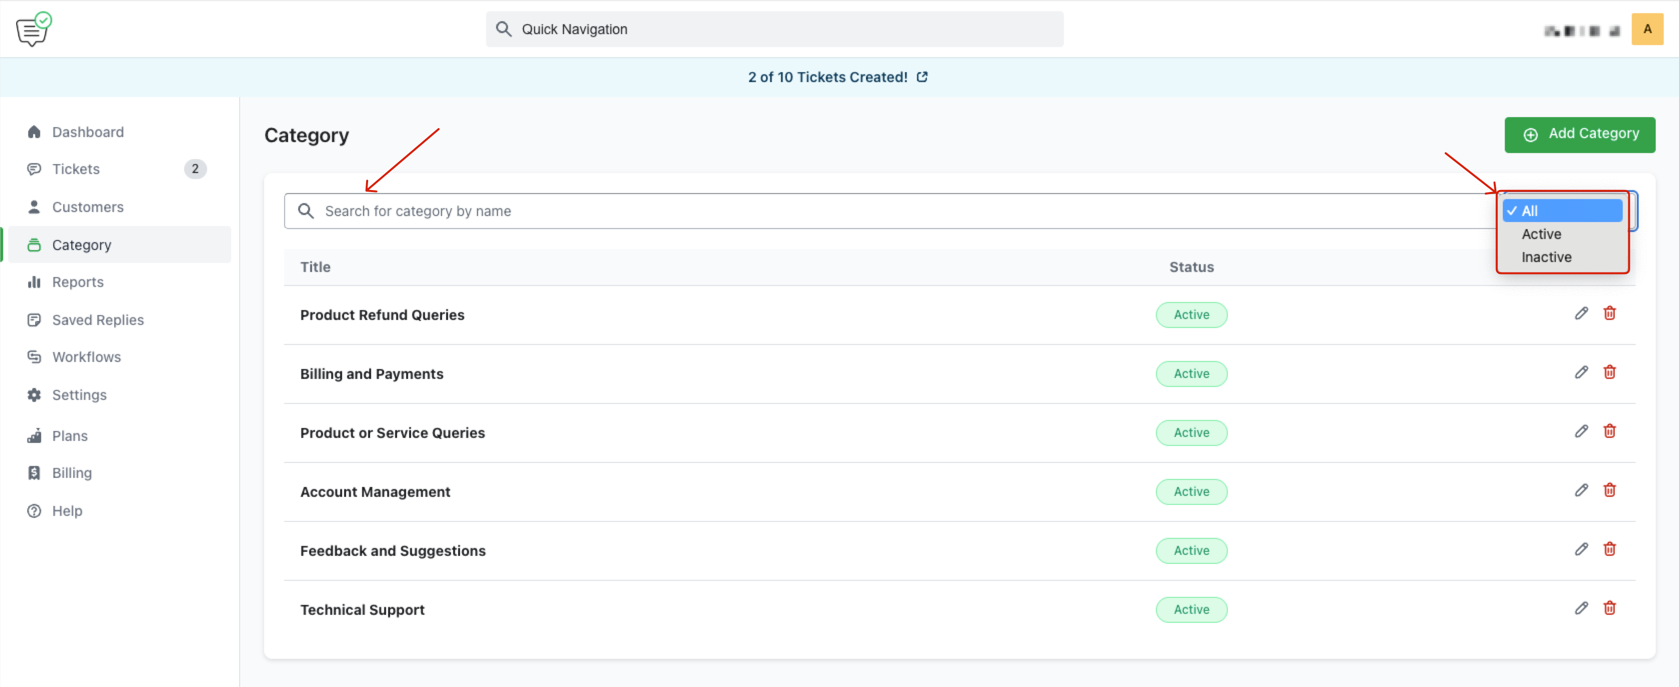
This helps you manage and organize ticket categories efficiently based on your support workflow.
Last updated on June 29, 2025