This guide shows how to install HelpEcho from the Shopify App Store, complete the quick setup wizard, and understand the main sections of the HelpEcho dashboard so you can start managing customer support smoothly.
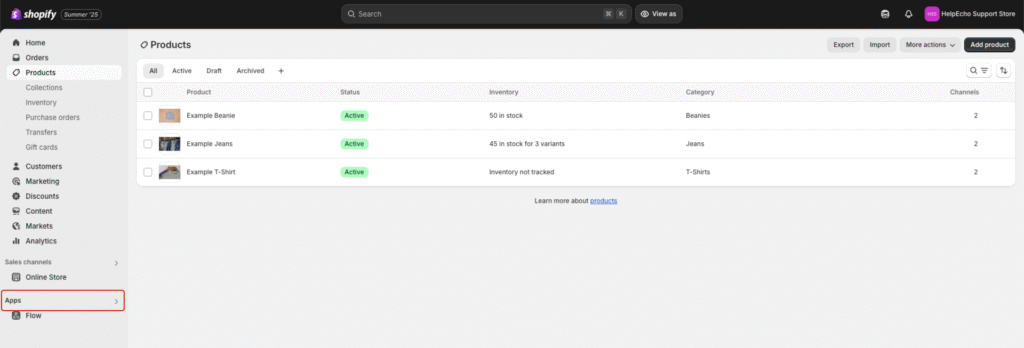
Step 1: Access the Apps Section
From the left-hand sidebar of your Shopify admin dashboard, click Apps to open the apps section.
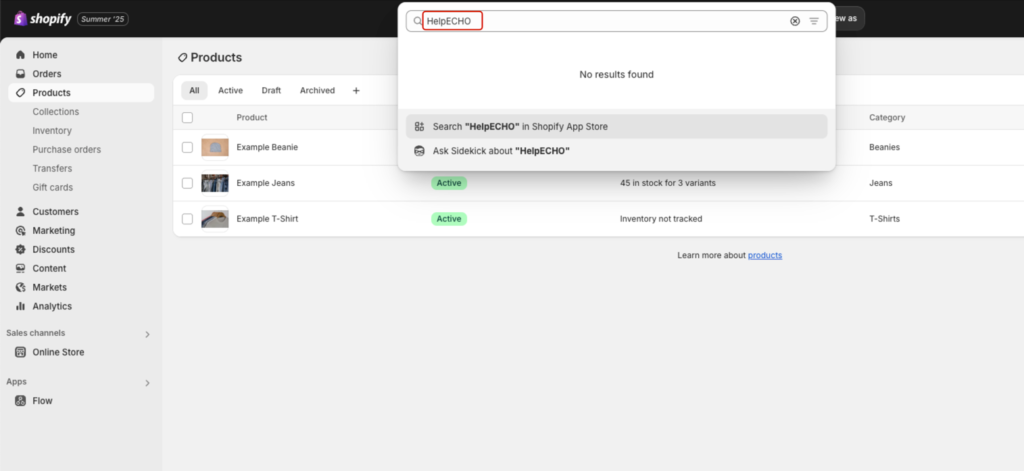
Step 2: Search for “HelpEcho”
Use the search bar in the Shopify App Store and type HelpEcho, then press Enter.
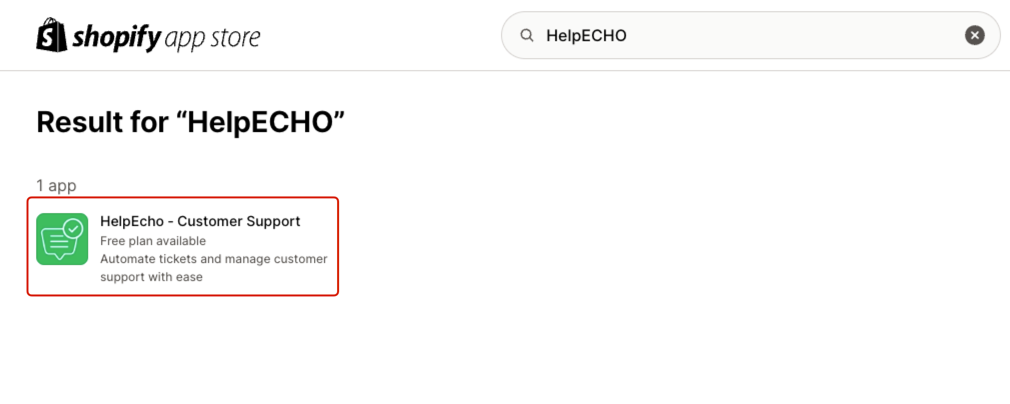
Step 3: Open the App Listing
Locate HelpEcho – Customer Support from the search results and click on it to open the app listing page.
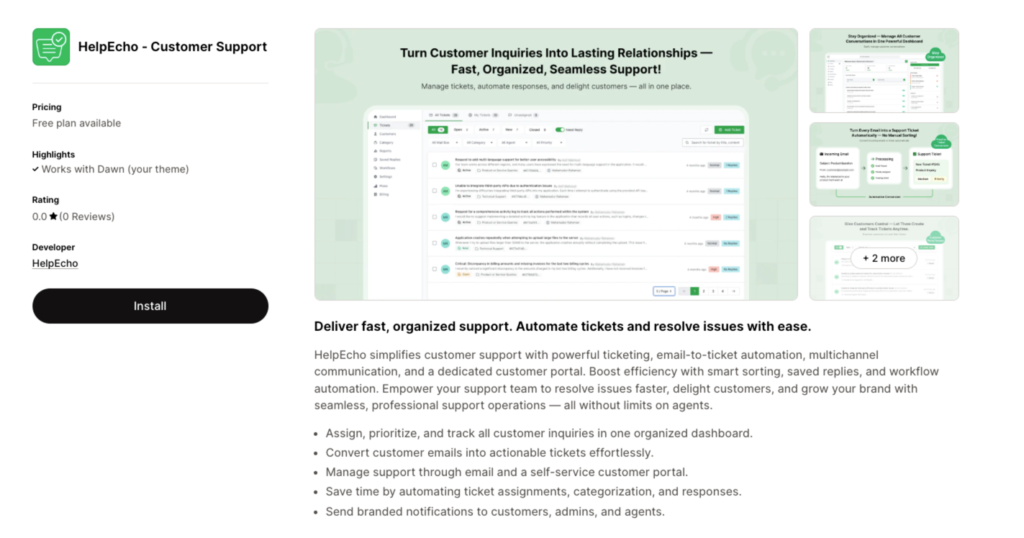
Step 4: Click the Install Button
On the HelpEcho app page, click the Install button to begin adding the app to your store.
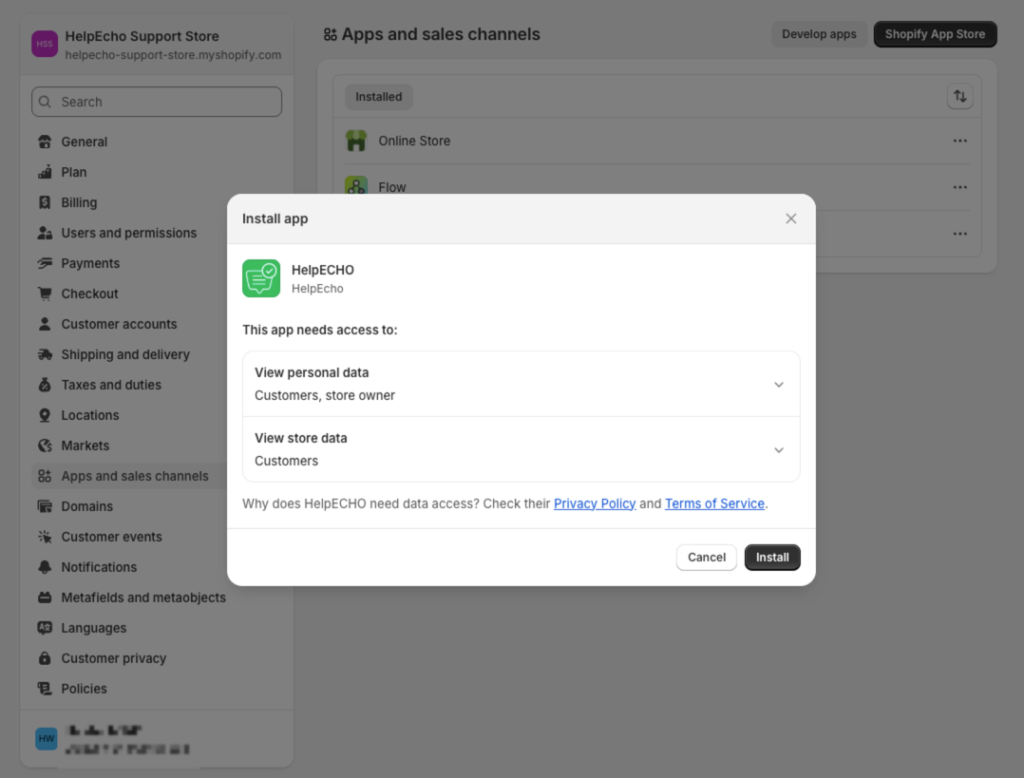
Step 5: Confirm App Permissions
You will be redirected back to your Shopify admin to review app permissions. Carefully review the access requirements, then click Install again to confirm.
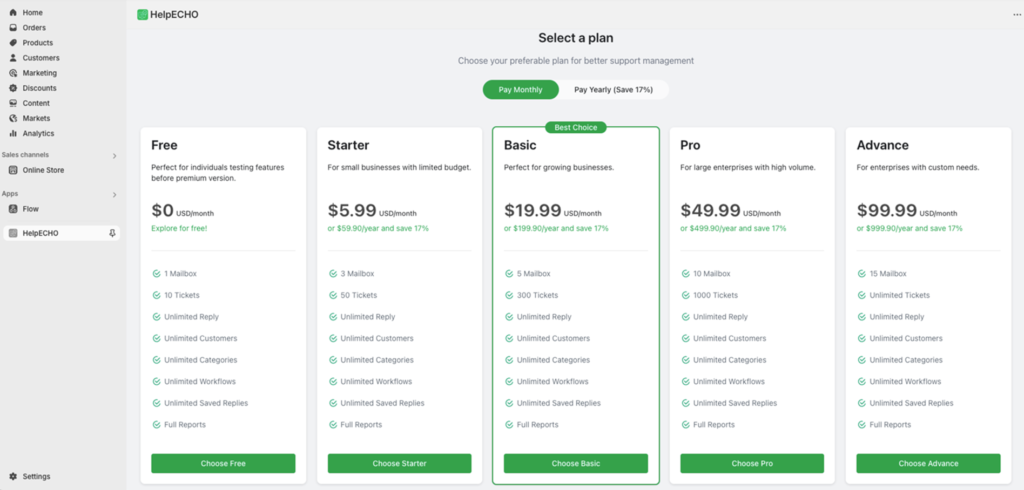
Step 6: Choose Your HelpEcho Plan
After installation, you will be taken to the HelpEcho pricing page. Select a plan that fits your support needs. You can start with the Free plan and upgrade later as your business grows.
Installation Complete
HelpEcho is now installed on your Shopify store. You’re ready to proceed with the initial configuration.
Tip: The Free plan is ideal for testing and includes core features such as ticket creation, replies, and basic automation.
Quick Setup Guide for HelpEcho
After installing HelpEcho, a quick setup wizard helps you configure essential settings so you can start using the app immediately. The setup process includes three simple steps.
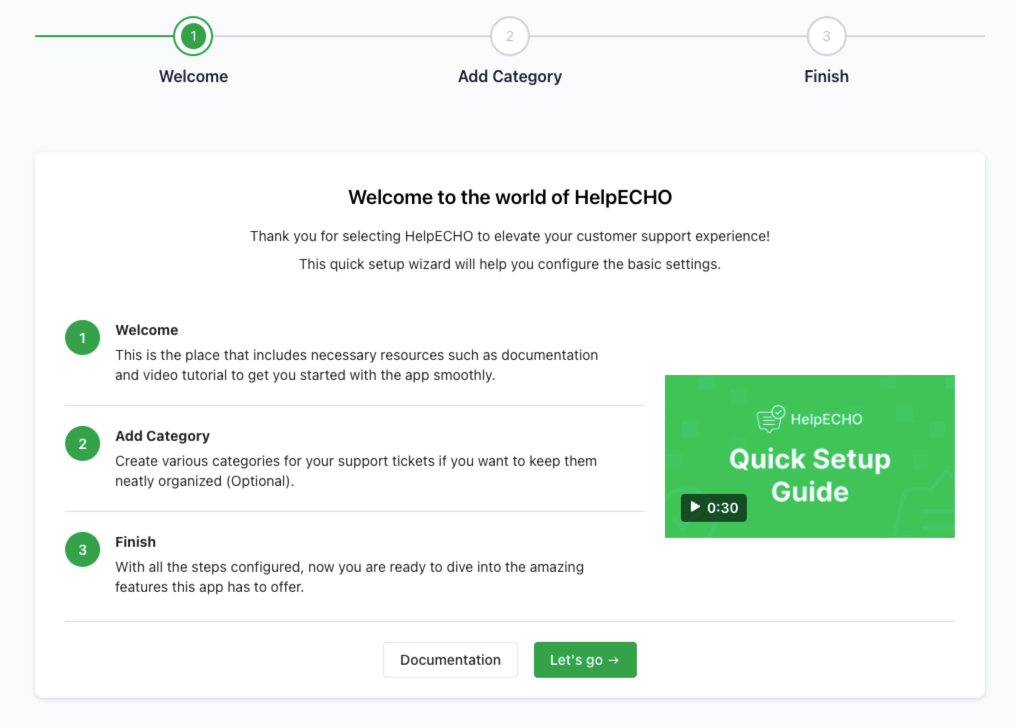
Step 1: Welcome
When you open HelpEcho for the first time, you’ll see the Welcome screen. This screen includes:
- A brief overview of HelpEcho
- A link to detailed documentation
- A short video tutorial explaining how the app works
Click Let’s go → to start the setup process.
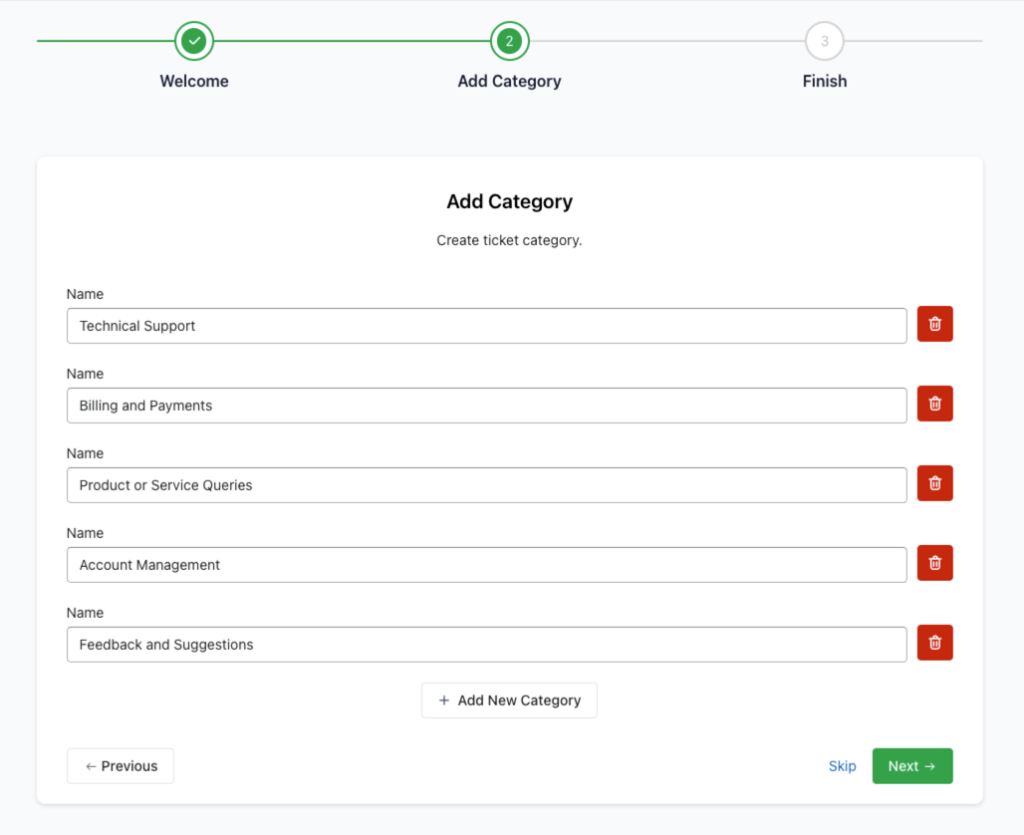
Step 2: Add Categories
In this step, you can create ticket categories to organize customer requests more efficiently.
To add categories:
- Enter a category name in the input field.
- Click Add New Category to create multiple categories.
Example categories:- Technical Support
- Billing and Payments
- Account Management
- Click Next → to continue.
You can skip this step and add categories later from the dashboard if needed.
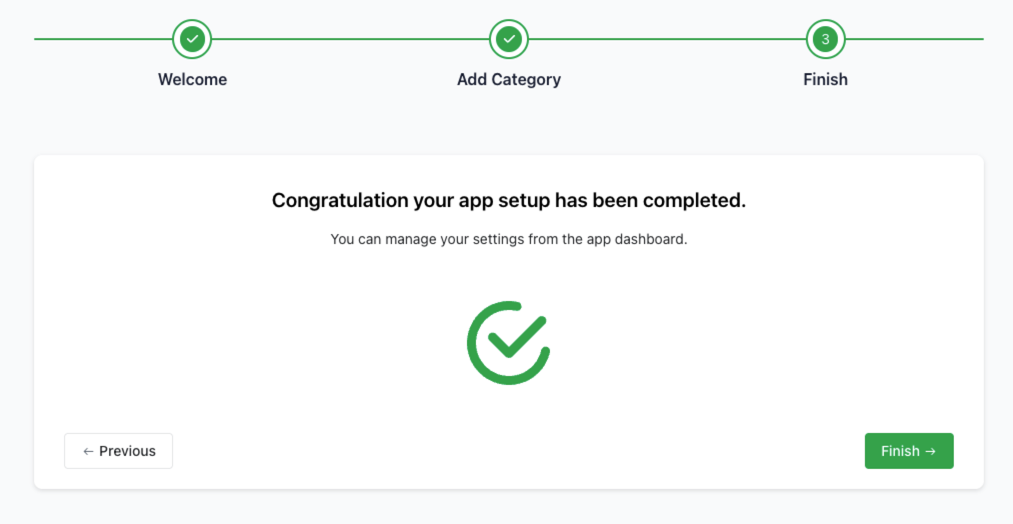
Step 3: Finish Setup
After adding or skipping categories, you’ll see a confirmation message:
“Congratulations, your app setup has been completed.”
Click Finish → to access the HelpEcho dashboard and start managing customer support.
3. Dashboard Overview of HelpEcho
The HelpEcho dashboard is the central hub for managing tickets, monitoring activity, and navigating all support tools. It provides a clear overview of your support performance at a glance.
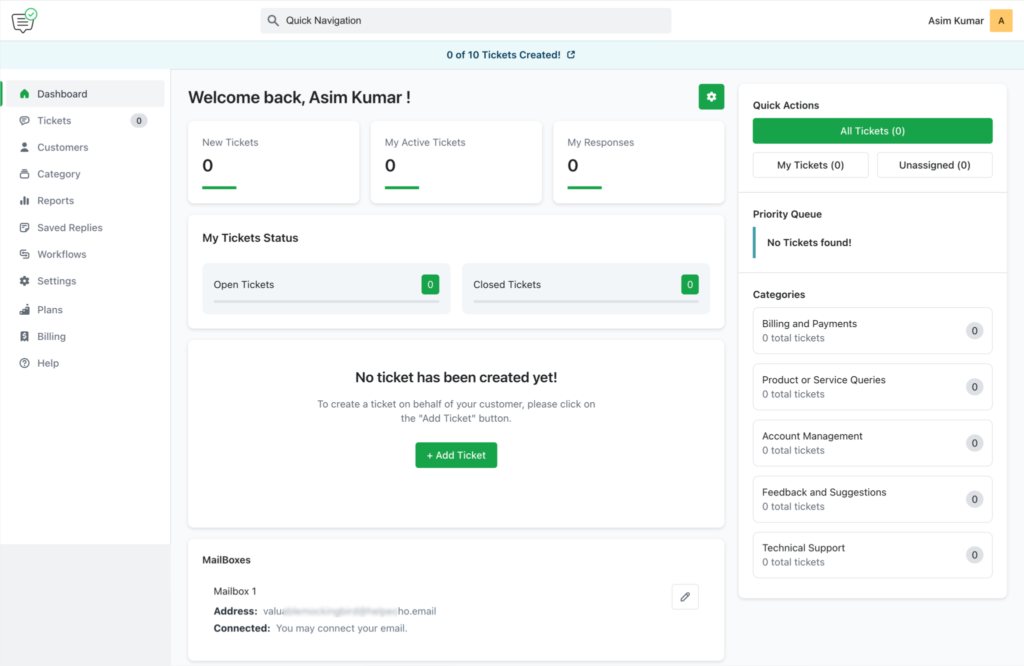
Welcome Panel
At the top of the dashboard, you’ll see a welcome message displaying your store or account name. This panel also shows three key statistics:
- New Tickets
- My Active Tickets
- My Responses
These metrics help you quickly understand your current support workload.
My Tickets Status
Below the welcome panel, the My Tickets Status section summarizes:
- Open Tickets
- Closed Tickets
This helps you track resolution progress across your support operations.
Add Ticket Button
If no tickets exist yet, you’ll see a prompt to get started using the green + Add Ticket button. This allows store owners or agents to manually create tickets on behalf of customers.
Quick Actions
On the right-hand side of the dashboard, the Quick Actions panel lets you quickly filter tickets by:
- All Tickets
- My Tickets
- Unassigned Tickets
This helps agents focus on assigned tickets or identify requests that still need attention.
Priority Queue
Below Quick Actions, the Priority Queue highlights high-priority tickets that require immediate action. If there are no urgent tickets, this section will indicate that the queue is empty.
Categories Summary
The Categories section displays all ticket categories along with the number of tickets in each category. This gives you a quick overview of where most support requests are coming from.
Mailboxes Panel
Near the bottom of the dashboard, the Mailboxes panel shows:
- Mailbox name
- Assigned email address
- Connection status
If a mailbox is not connected, you’ll see a prompt to connect it. Mailboxes enable the email-to-ticket feature in HelpEcho.
Conclusion
This completes the installation, setup, and dashboard overview of HelpEcho. Once configured, the dashboard becomes your primary workspace for managing tickets, tracking performance, and supporting customers efficiently.
You’re now ready to start using HelpEcho to deliver faster, more organized customer support from your Shopify store.