Installing the HelpEcho app allows you to manage customer support efficiently from your Shopify dashboard. This guide will walk you through each step of the installation process—from logging in to selecting your plan—so you can get started without confusion.
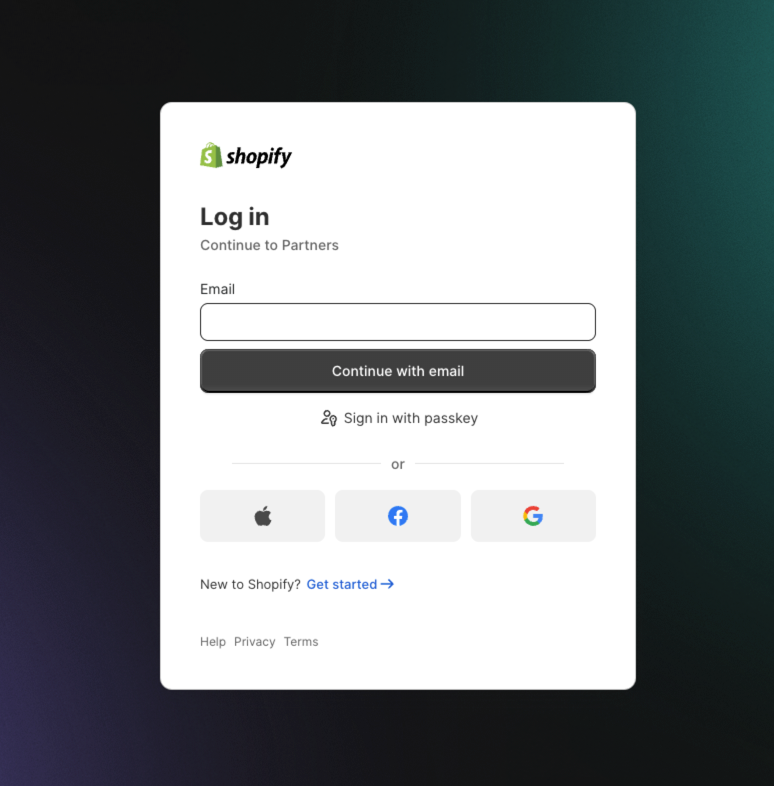
Step 1: Log In to Your Shopify Account
Go to shopify.com and log in using your existing store credentials. This will take you to your Shopify admin panel.
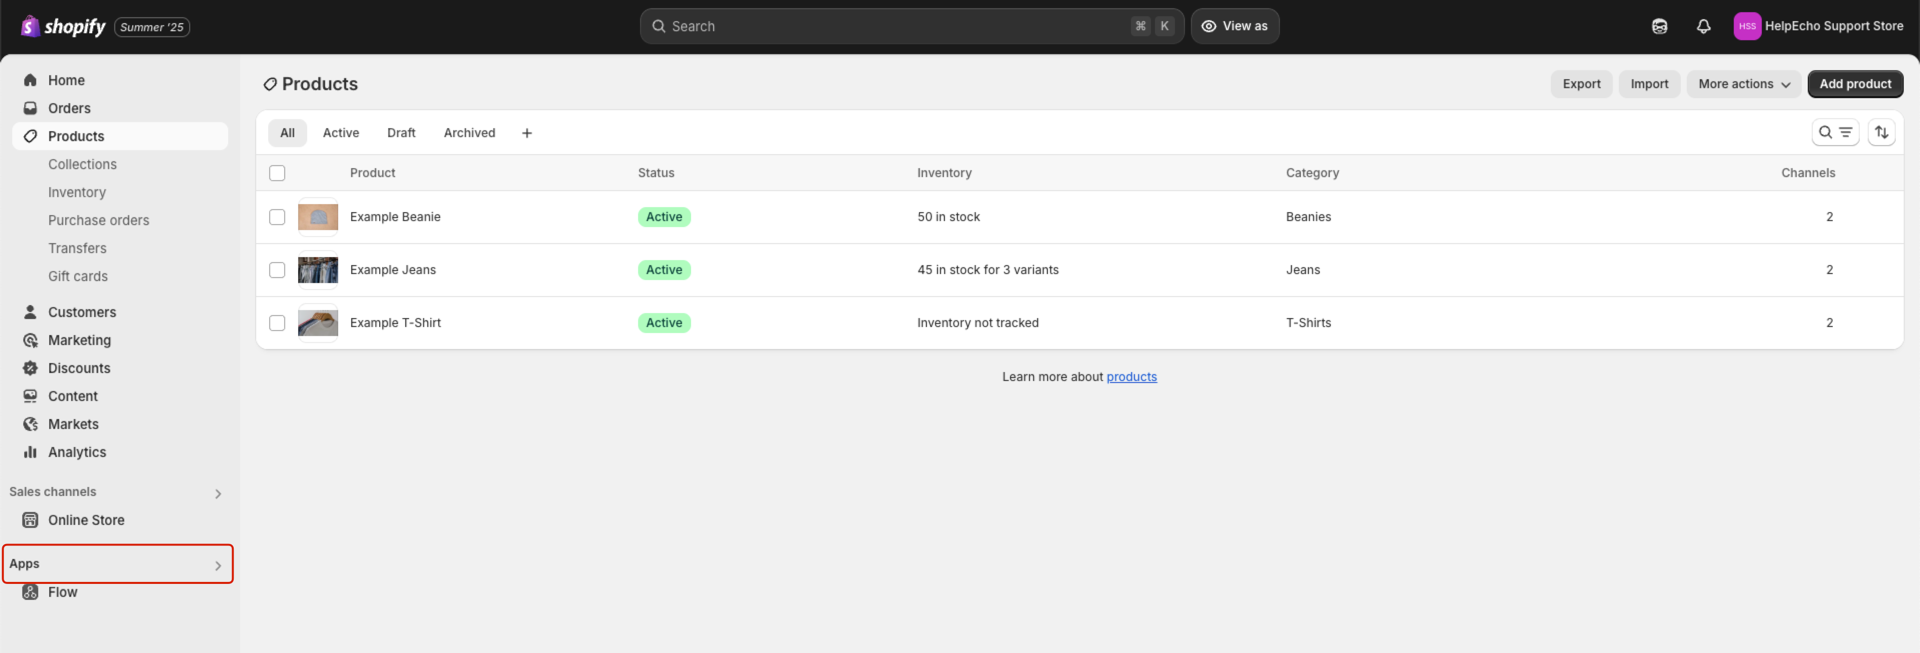
Step 2: Access the Apps Section
Once logged in, navigate to the Apps section from the left-hand sidebar of your dashboard.
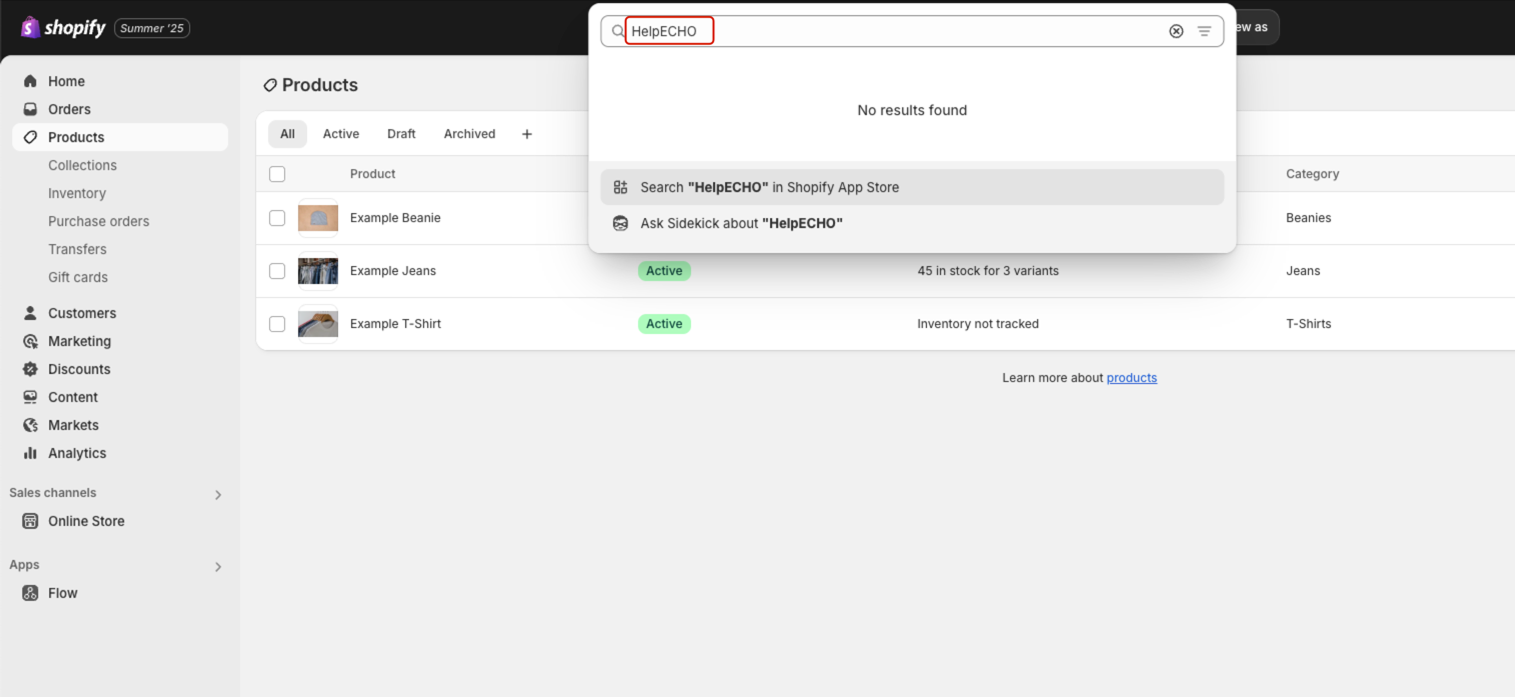
Step 3: Search for “HelpECHO”
Click the search bar and type HelpECHO, then press Enter to search in the Shopify App Store.
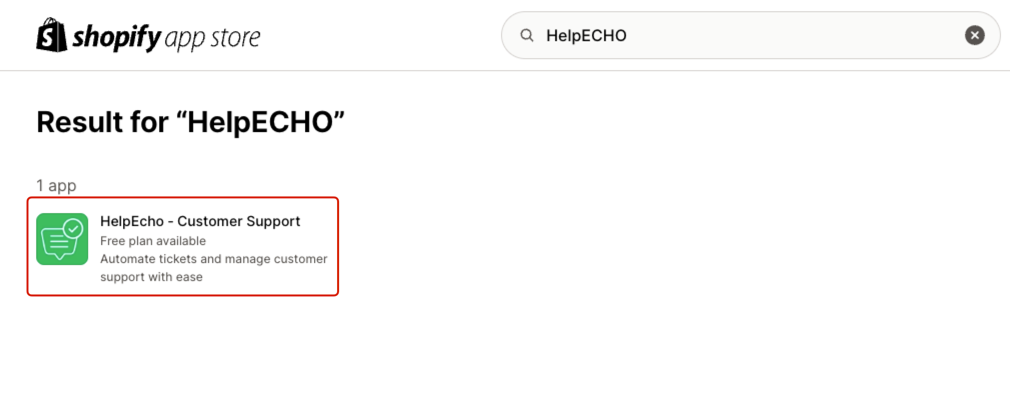
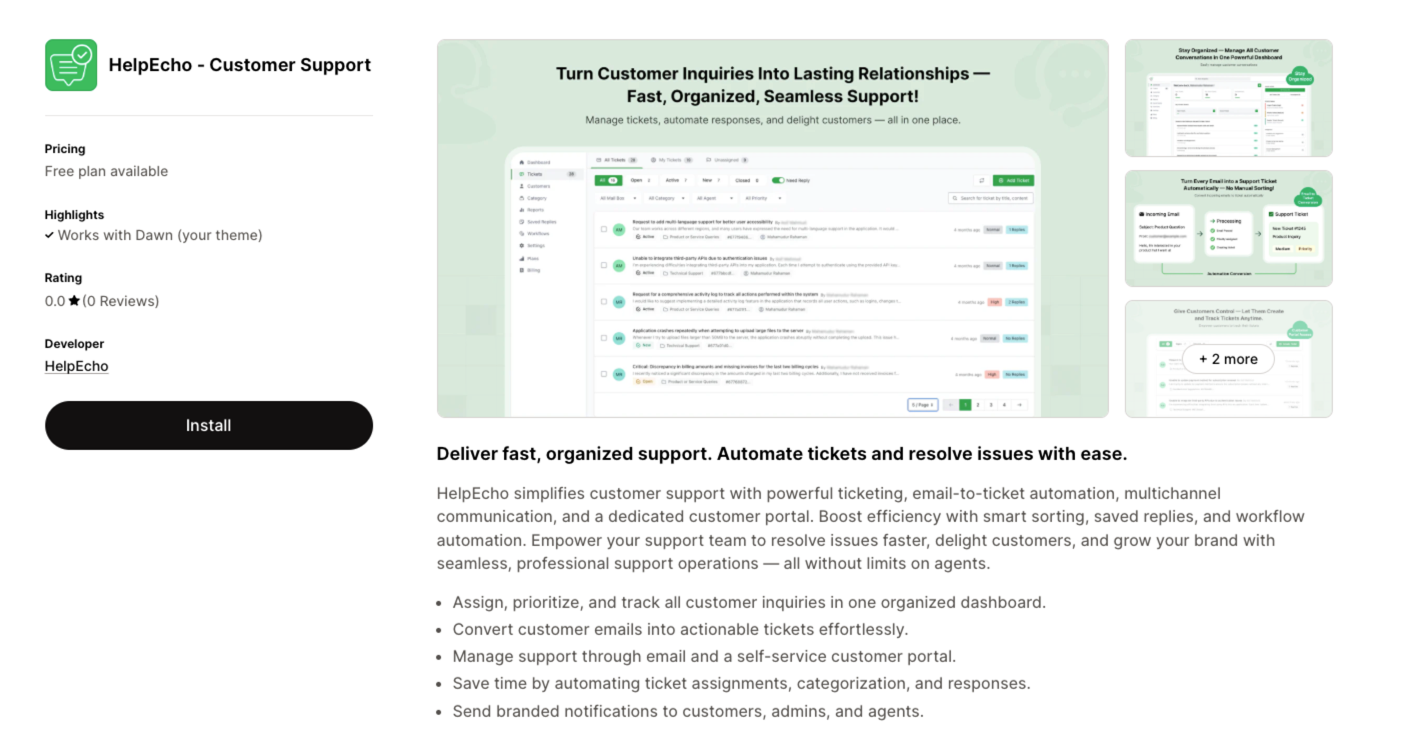
Step 4: Open the App Listing
Find the app named HelpEcho – Customer Support in the search results and click on it to open the app’s listing page.
Step 5: Click the Install Button
On the HelpEcho app details page, click the Install button to proceed with adding the app to your store.
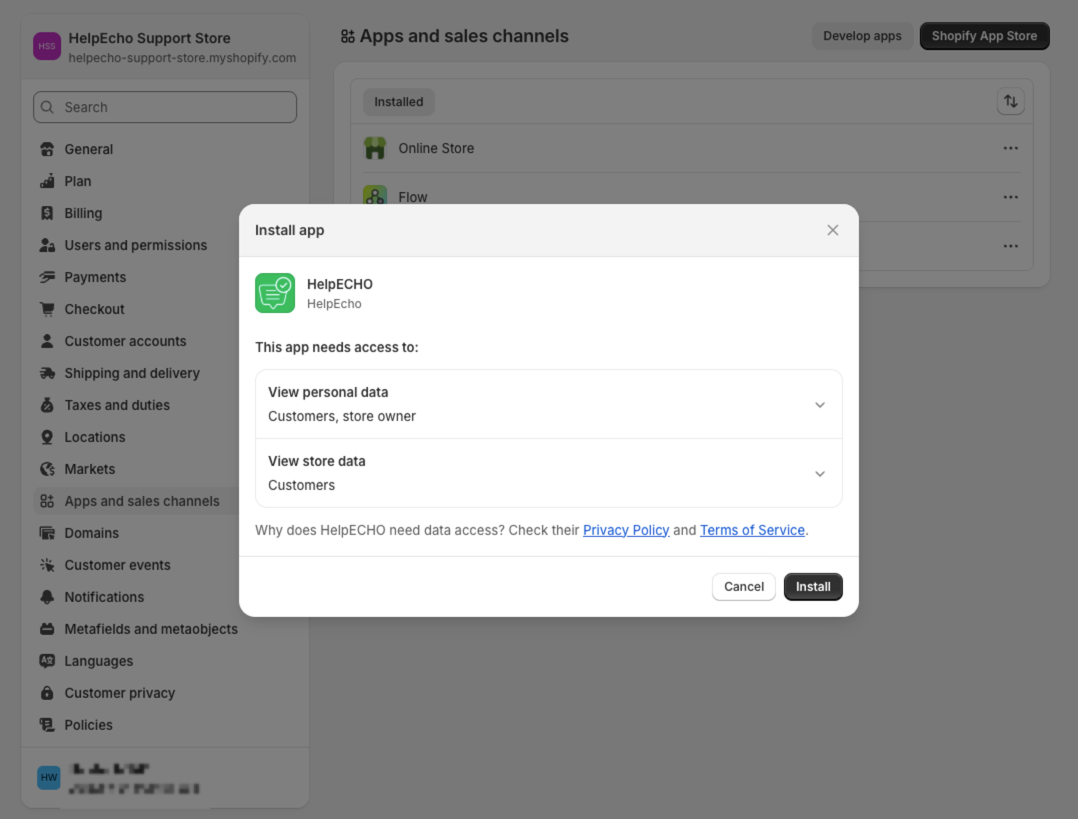
Step 6: Confirm App Permissions
After clicking Install, you will be redirected to your store’s admin where a permission popup will appear. Review the permissions and click Install again to confirm.
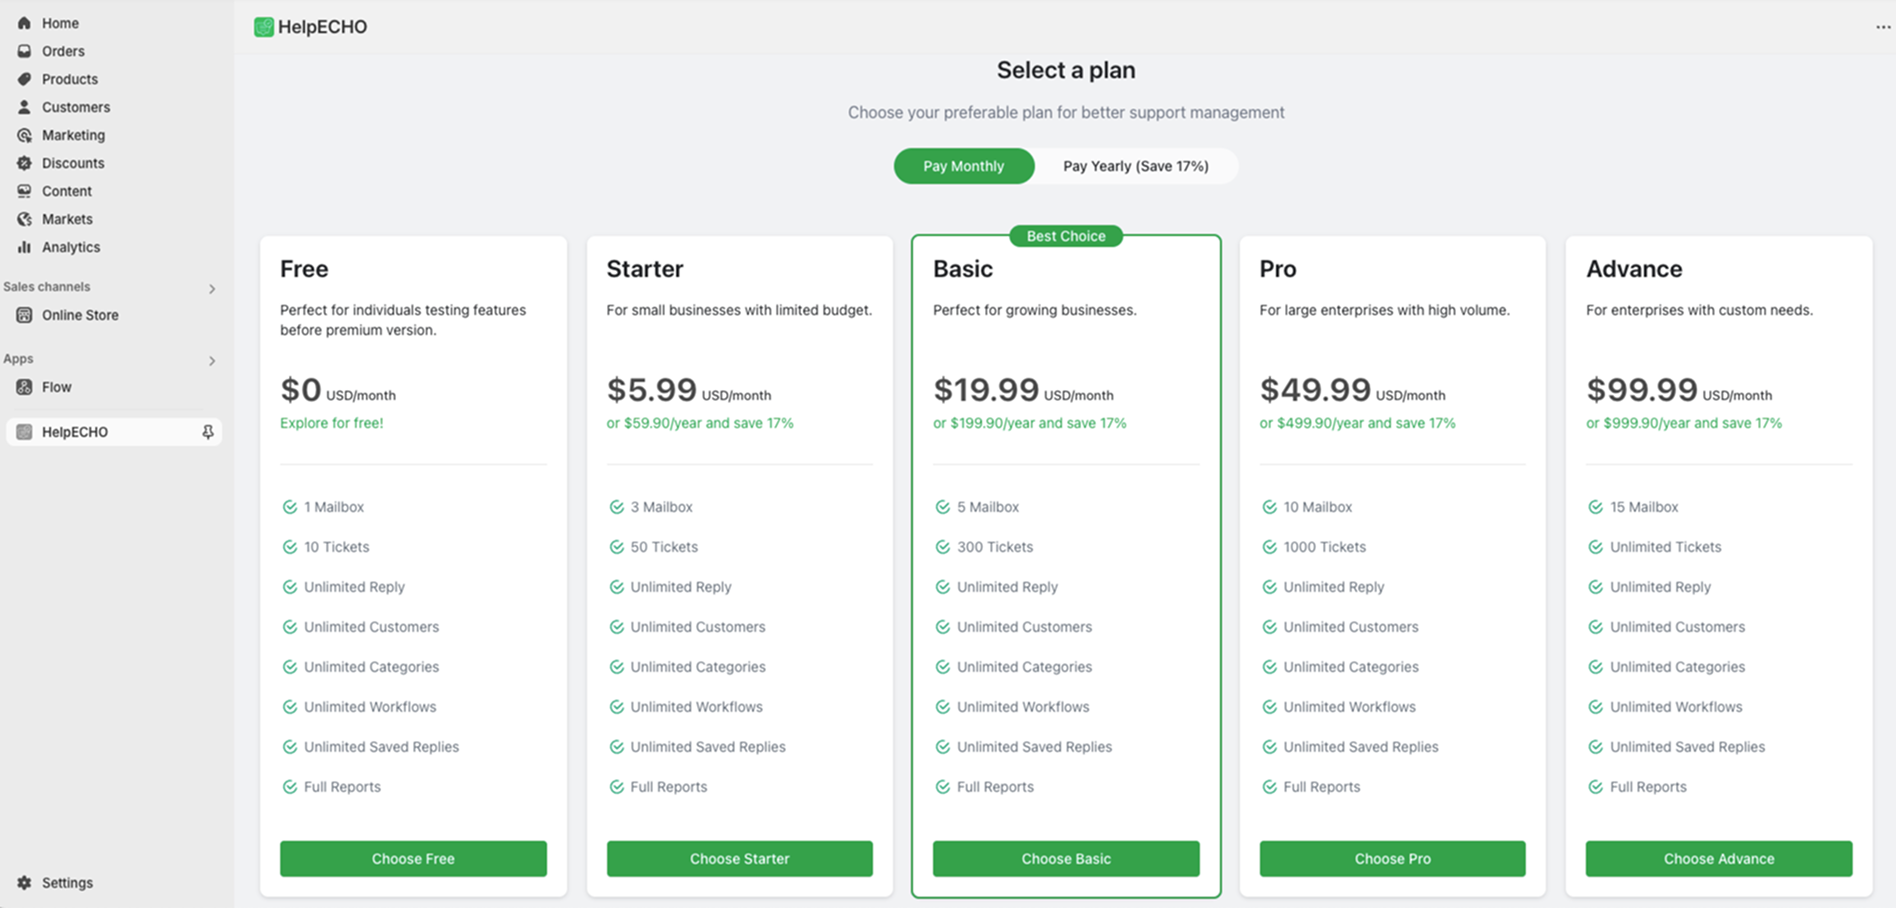
Step 7: Choose Your HelpEcho Plan
Once installation is complete, you’ll be taken to the HelpEcho pricing page. Select a plan based on your support needs. You can start with the free plan or upgrade as your business grows.
Conclusion
You’ve now successfully installed the HelpEcho app on your Shopify store. You’re ready to set up your support portal and start managing tickets with ease.
To continue, check out the Quick Setup Guide for initial configuration steps.
Tip: If you’re just testing, the Free plan gives access to core features like ticket creation, replies, and basic automation.