This guide explains how to manage customer profiles within the HelpEcho dashboard. You can add, edit, filter, and control customer status efficiently.
Add New Customer
To manually add a customer:
- Go to the Customers tab from the left sidebar.
- Click the green Add Customer button.
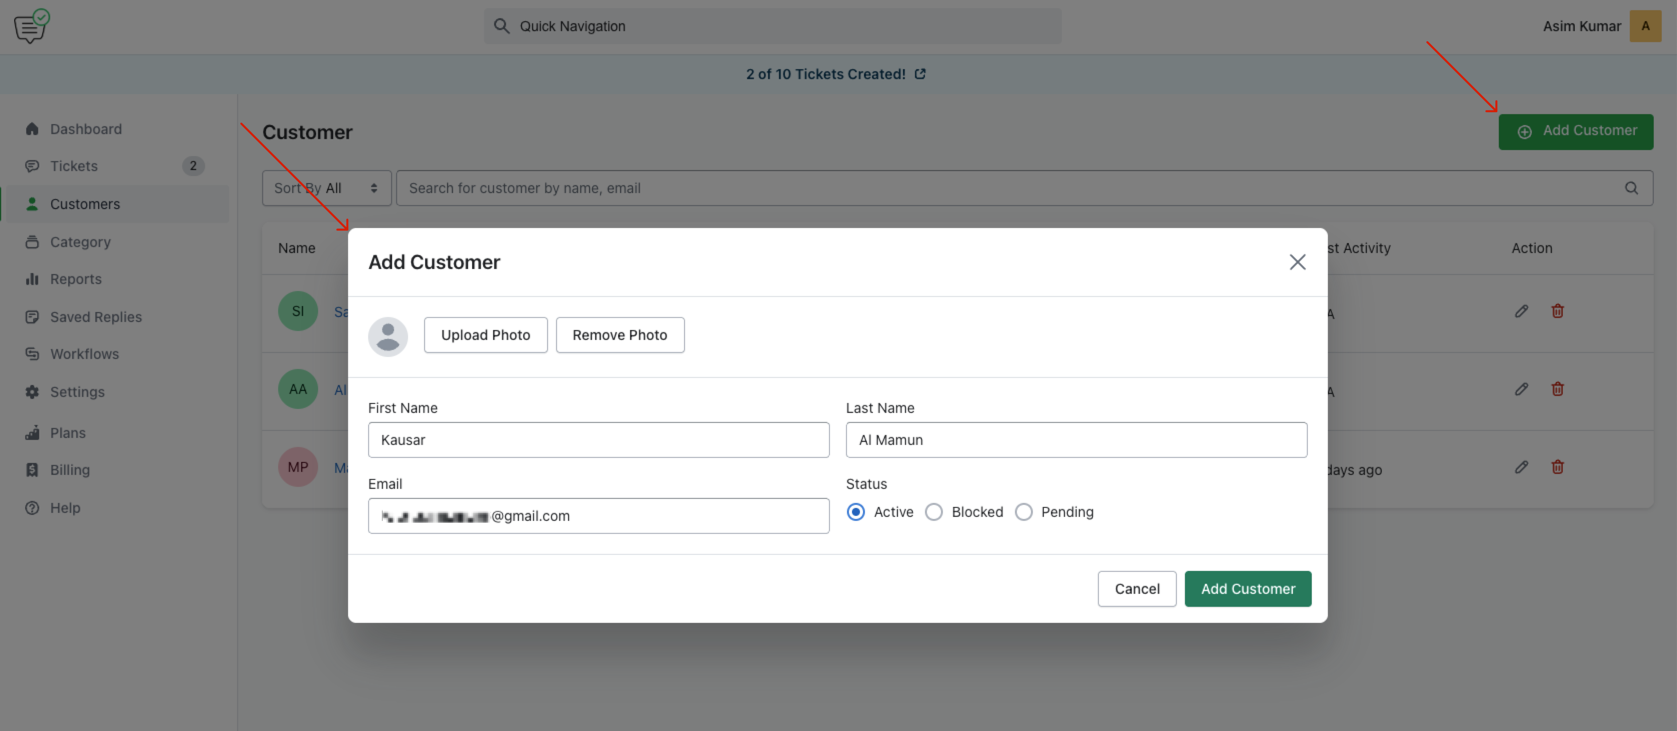
In the popup form:
- Upload a photo (optional)
- Enter the customer’s First Name, Last Name, and Email
- Set the Status to: Active, Blocked, or Pending
- Click Add Customer to save
View Customer List with Status
The customer list shows all added users along with:
- Name
- Status badge (Active, Blocked, Pending)
- Last Activity
- Action buttons (Edit or Delete)
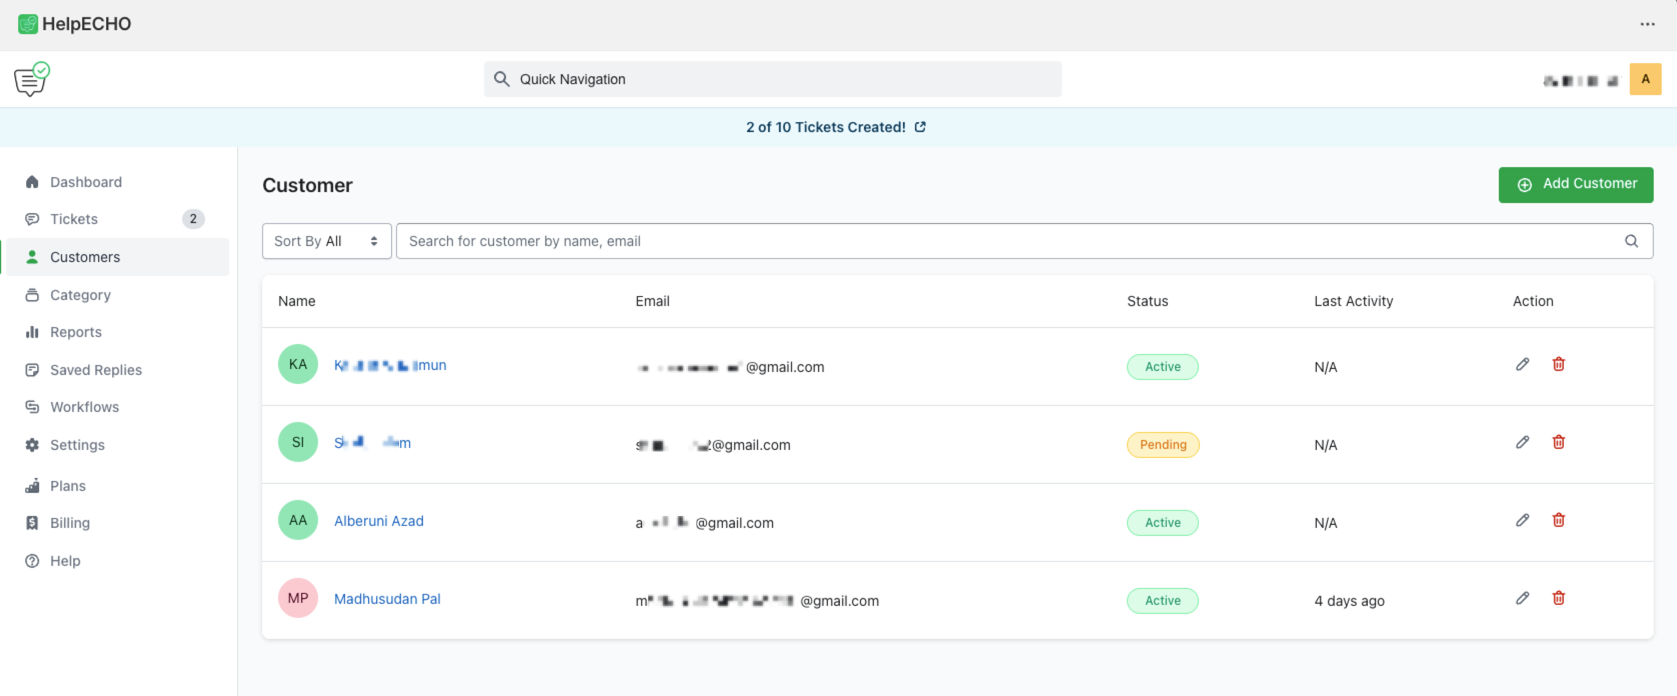
This overview helps you quickly identify and manage customers.
Edit Customer Info and Profile
To update a customer’s information:
- Click the Edit icon under the Action column
- Update the name, email, or status
- You can also upload/remove photo
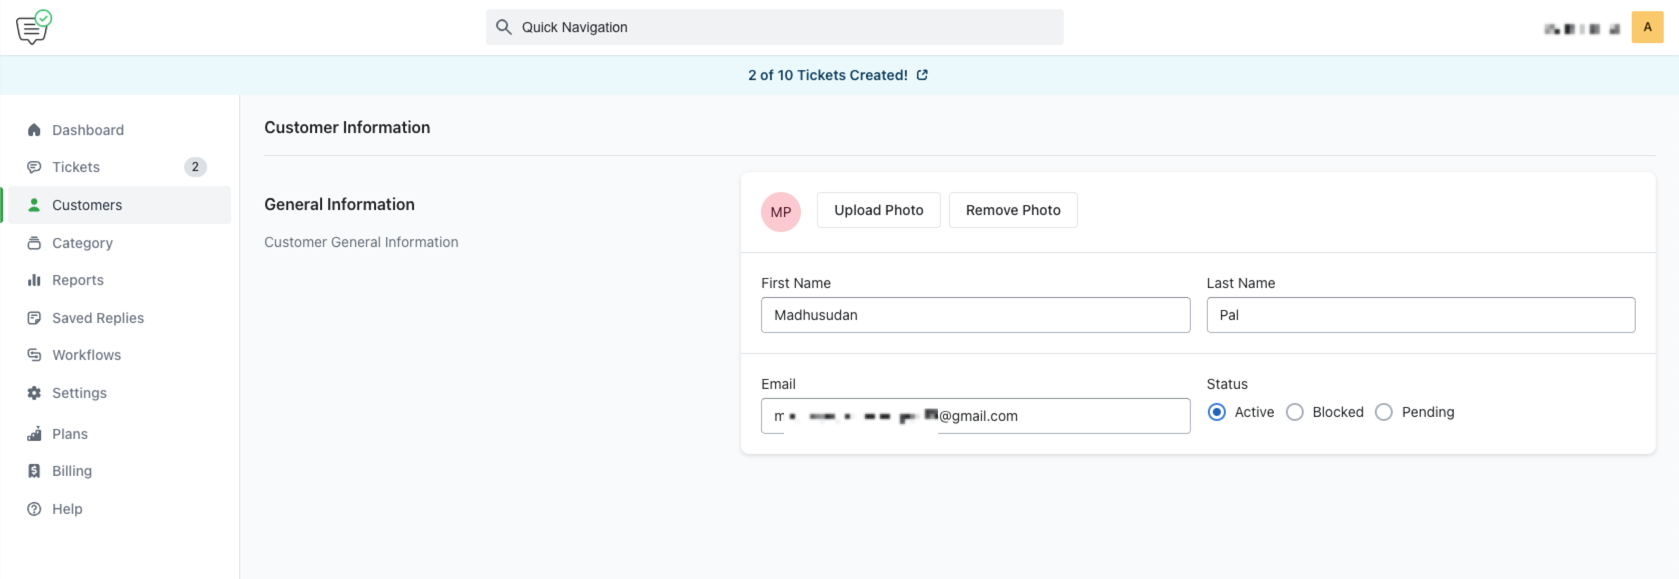
Click Save to apply changes.
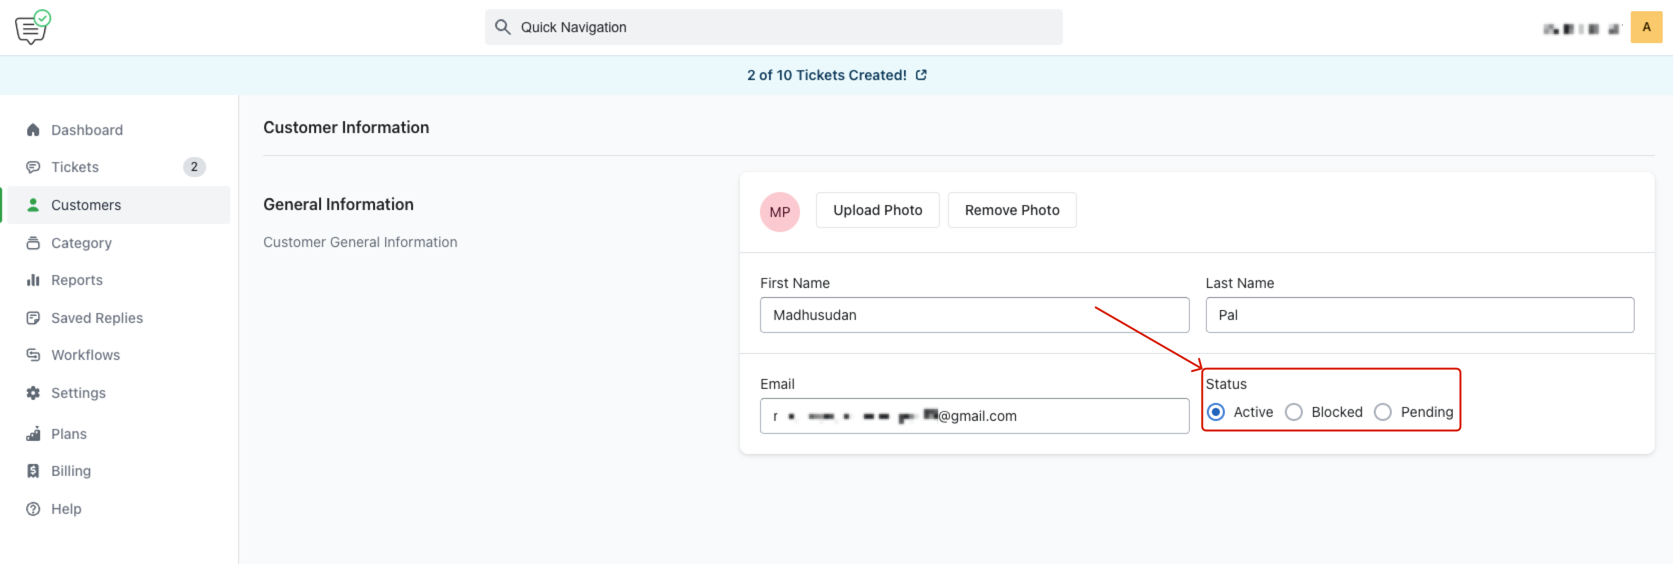
Change Customer Status (Active, Blocked, Pending)
While editing a customer, you can toggle their status between:
- Active – can log in and submit tickets
- Blocked – restricted from access
- Pending – account not yet approved
Search and Sort by Status
Use the dropdown and search bar to:
- Filter customers by status (All, Active, Blocked, Pending)
- Search by name or email
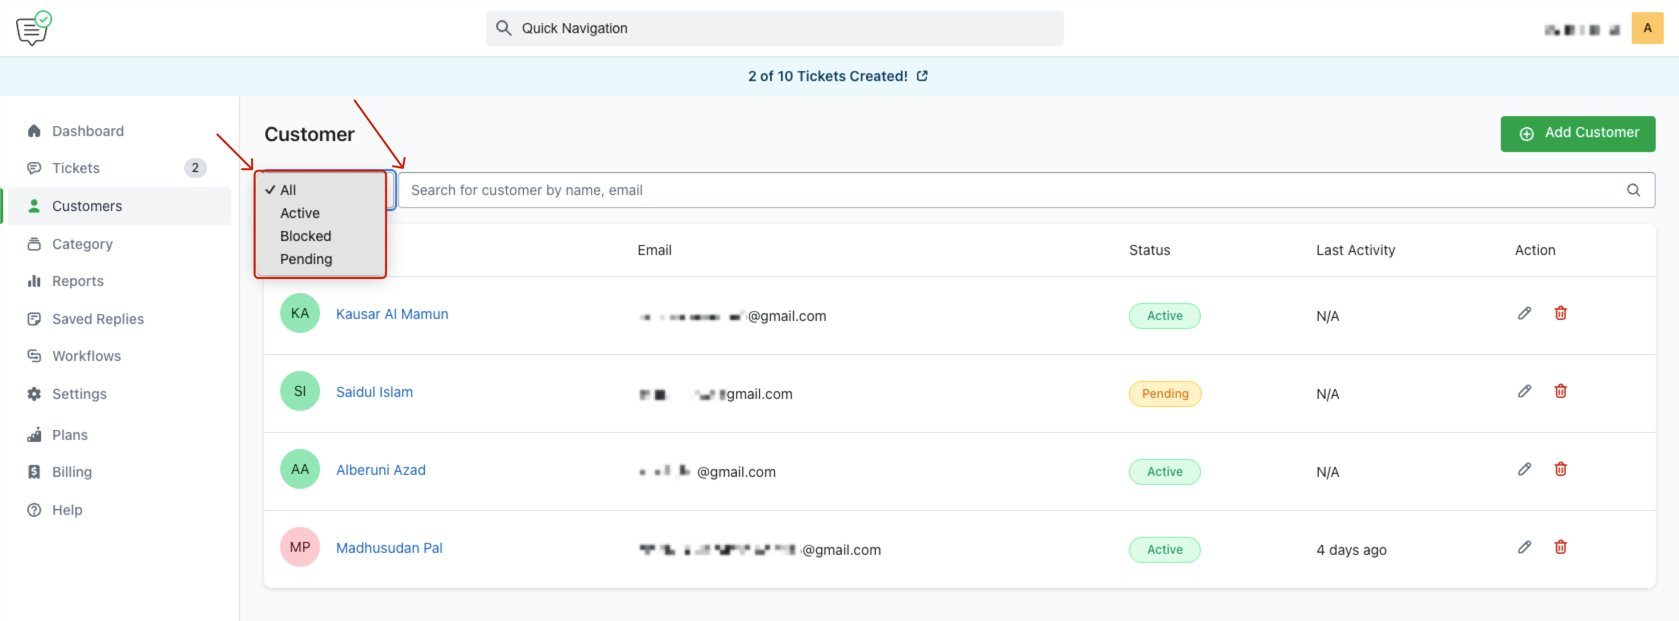
This helps you quickly find and manage specific users.
Last updated on June 29, 2025