Mailbox Settings in HelpEcho allow you to configure how your support email works. From adding mailboxes to setting up auto-responses, you can manage everything from one place. Each mailbox can be connected to a unique email and customized with automated email templates for better communication with customers and agents.
How to Add a Mailbox
- Go to Settings > Mailbox from the left menu.
- Click on the Add Mailbox button.
- Enter the Title for the mailbox (e.g., Support Mailbox).
- Click Add Mailbox.

You’ll see your newly added mailbox listed among the others.
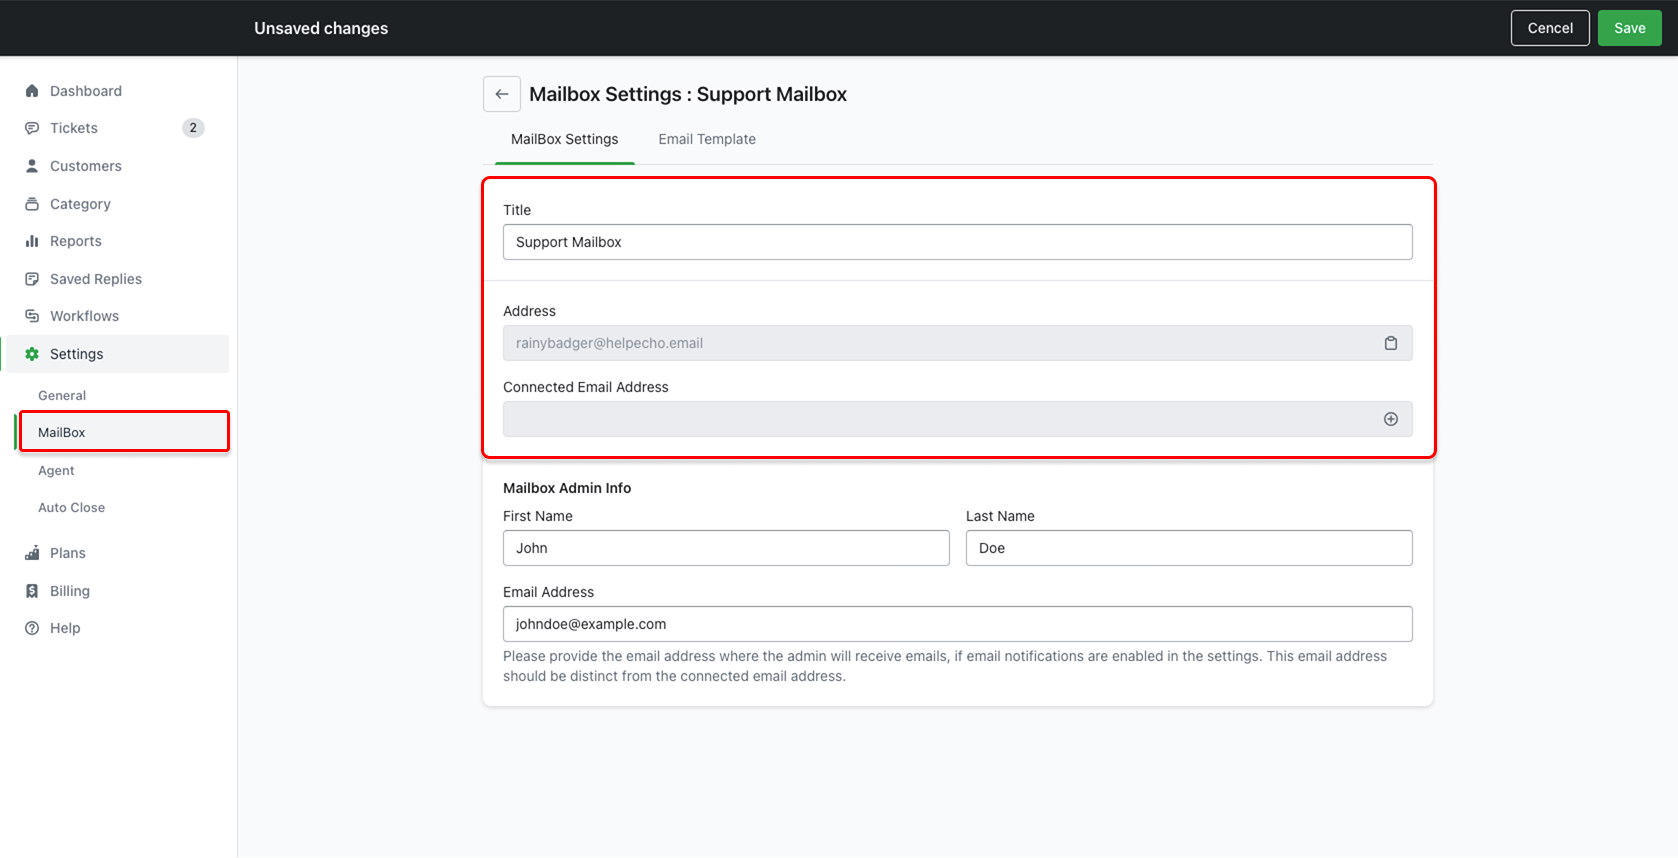
Mailbox Fields
Each mailbox contains the following details:
- Title – The name you assign to the mailbox.
- Address – The HelpEcho-generated email address (e.g., rainybadger@helpecho.email).
- Connected – Shows the connection status. (“You may connect your email”)
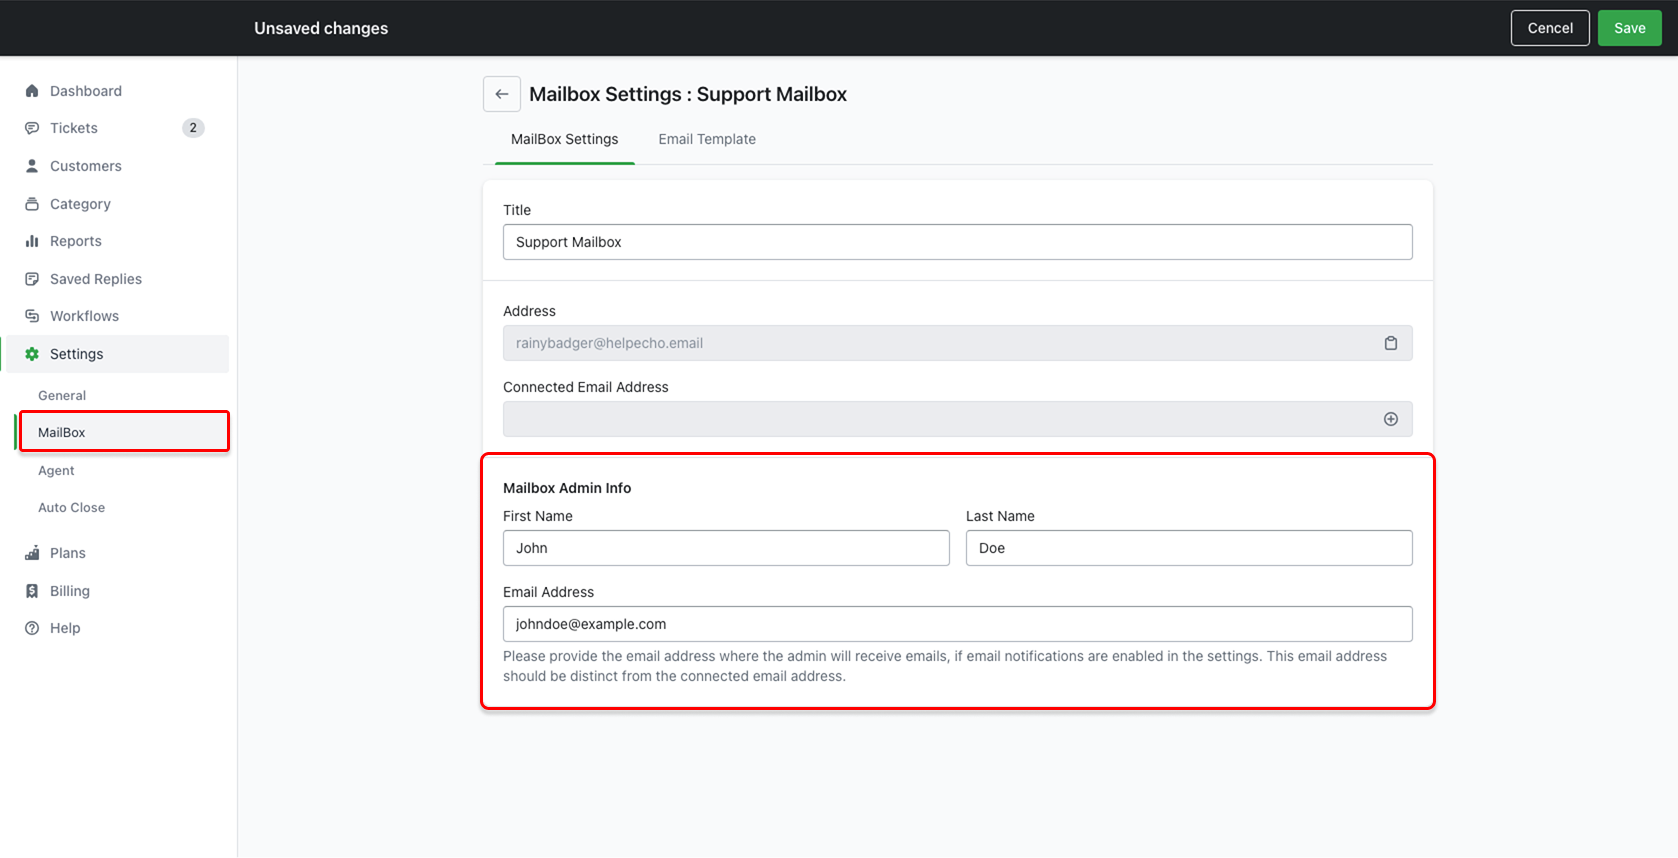
Mailbox Admin Info
To receive system notifications or alerts:
- Add the admin’s First Name, Last Name, and Email Address.
- This email should be separate from the mailbox address.
Email Templates per Mailbox
Each mailbox comes with 7 email templates to automate notifications:
- New Ticket Created (To Customer)
- New Ticket Created (To Admin)
- New Ticket Created by Agent (To Customer)
- Ticket Closed by Agent (To Customer)
- Ticket Agent Change (To Agent)
- Replied by Agent (To Customer)
- Replied by Customer (To Agent)
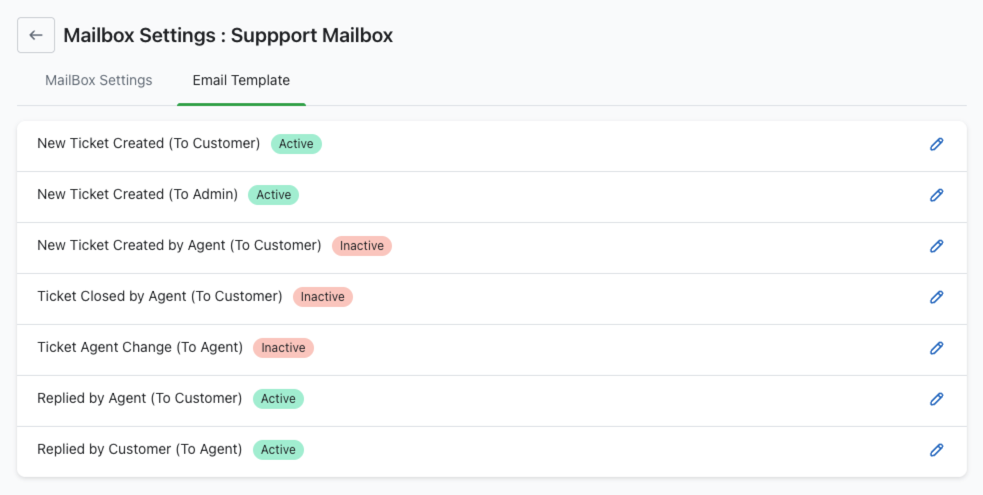
You can enable/disable each template and edit the message content.
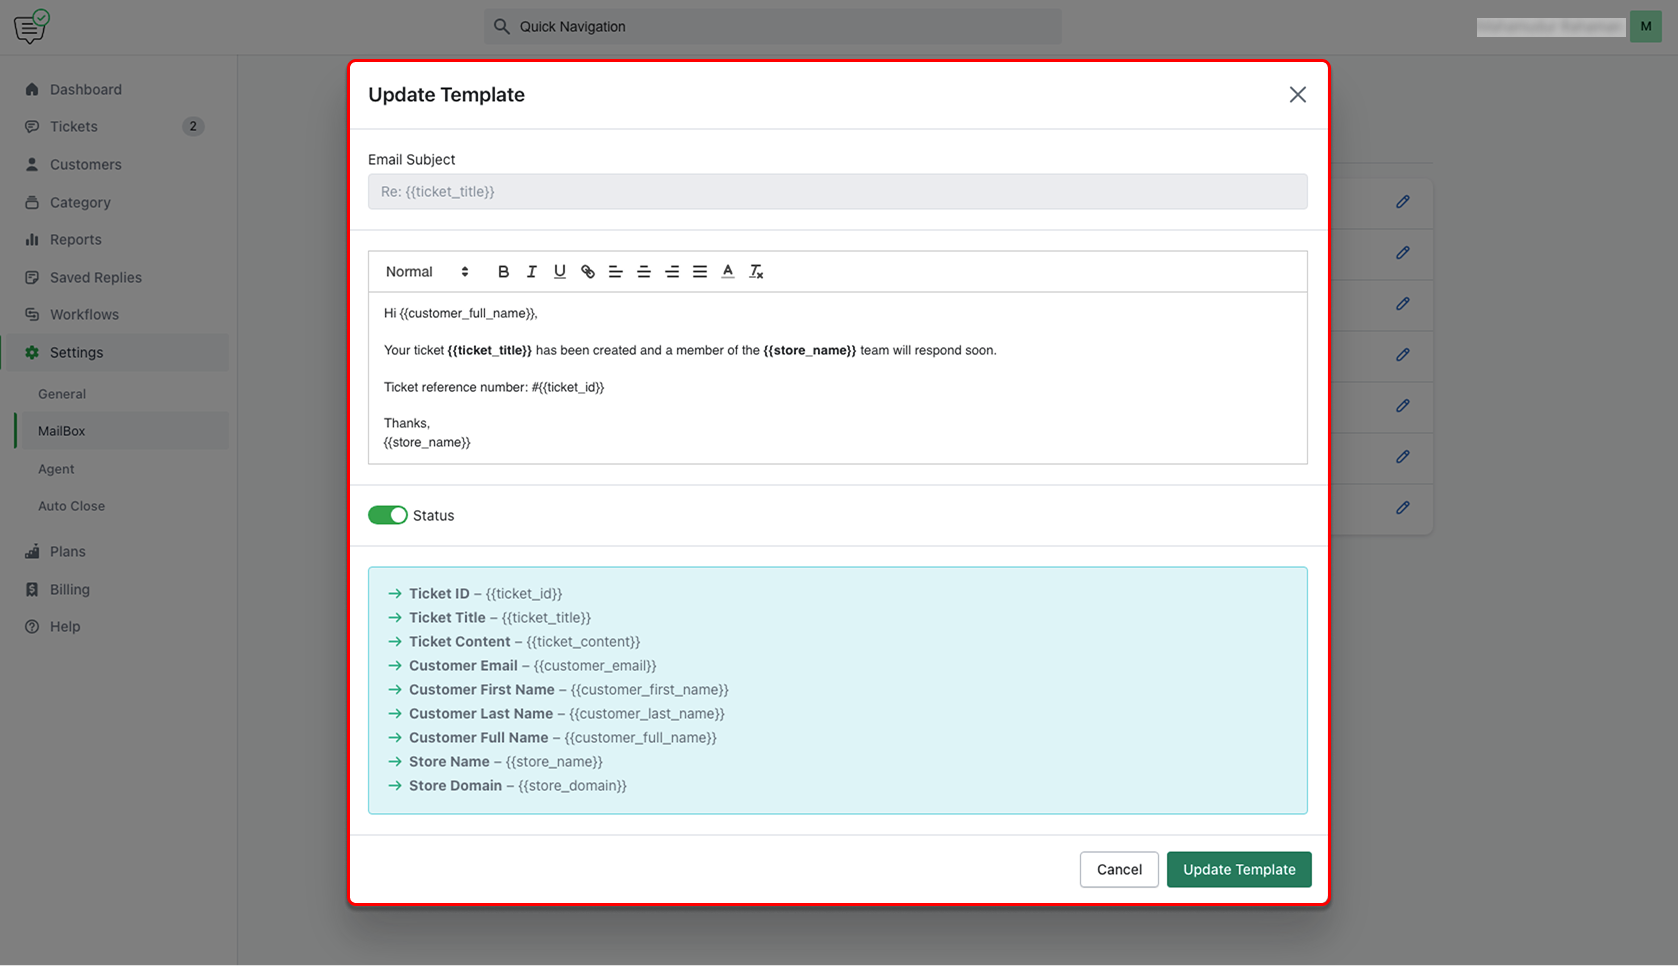
Editing a Template
- Click the pencil icon beside a template.
- Update the Email Subject and Body.
- Use available variables like
{{ticket_id}},{{ticket_title}},{{customer_full_name}}, etc. - Toggle the Status to activate/deactivate the template.
- Click Update Template.
Last updated on June 29, 2025