To allow your customers to create support tickets using the HelpEcho app, you can embed the HelpEcho block on any Shopify page.
Step 1: Create a Custom Template
Before creating the support page, you first need to create a dedicated page template.
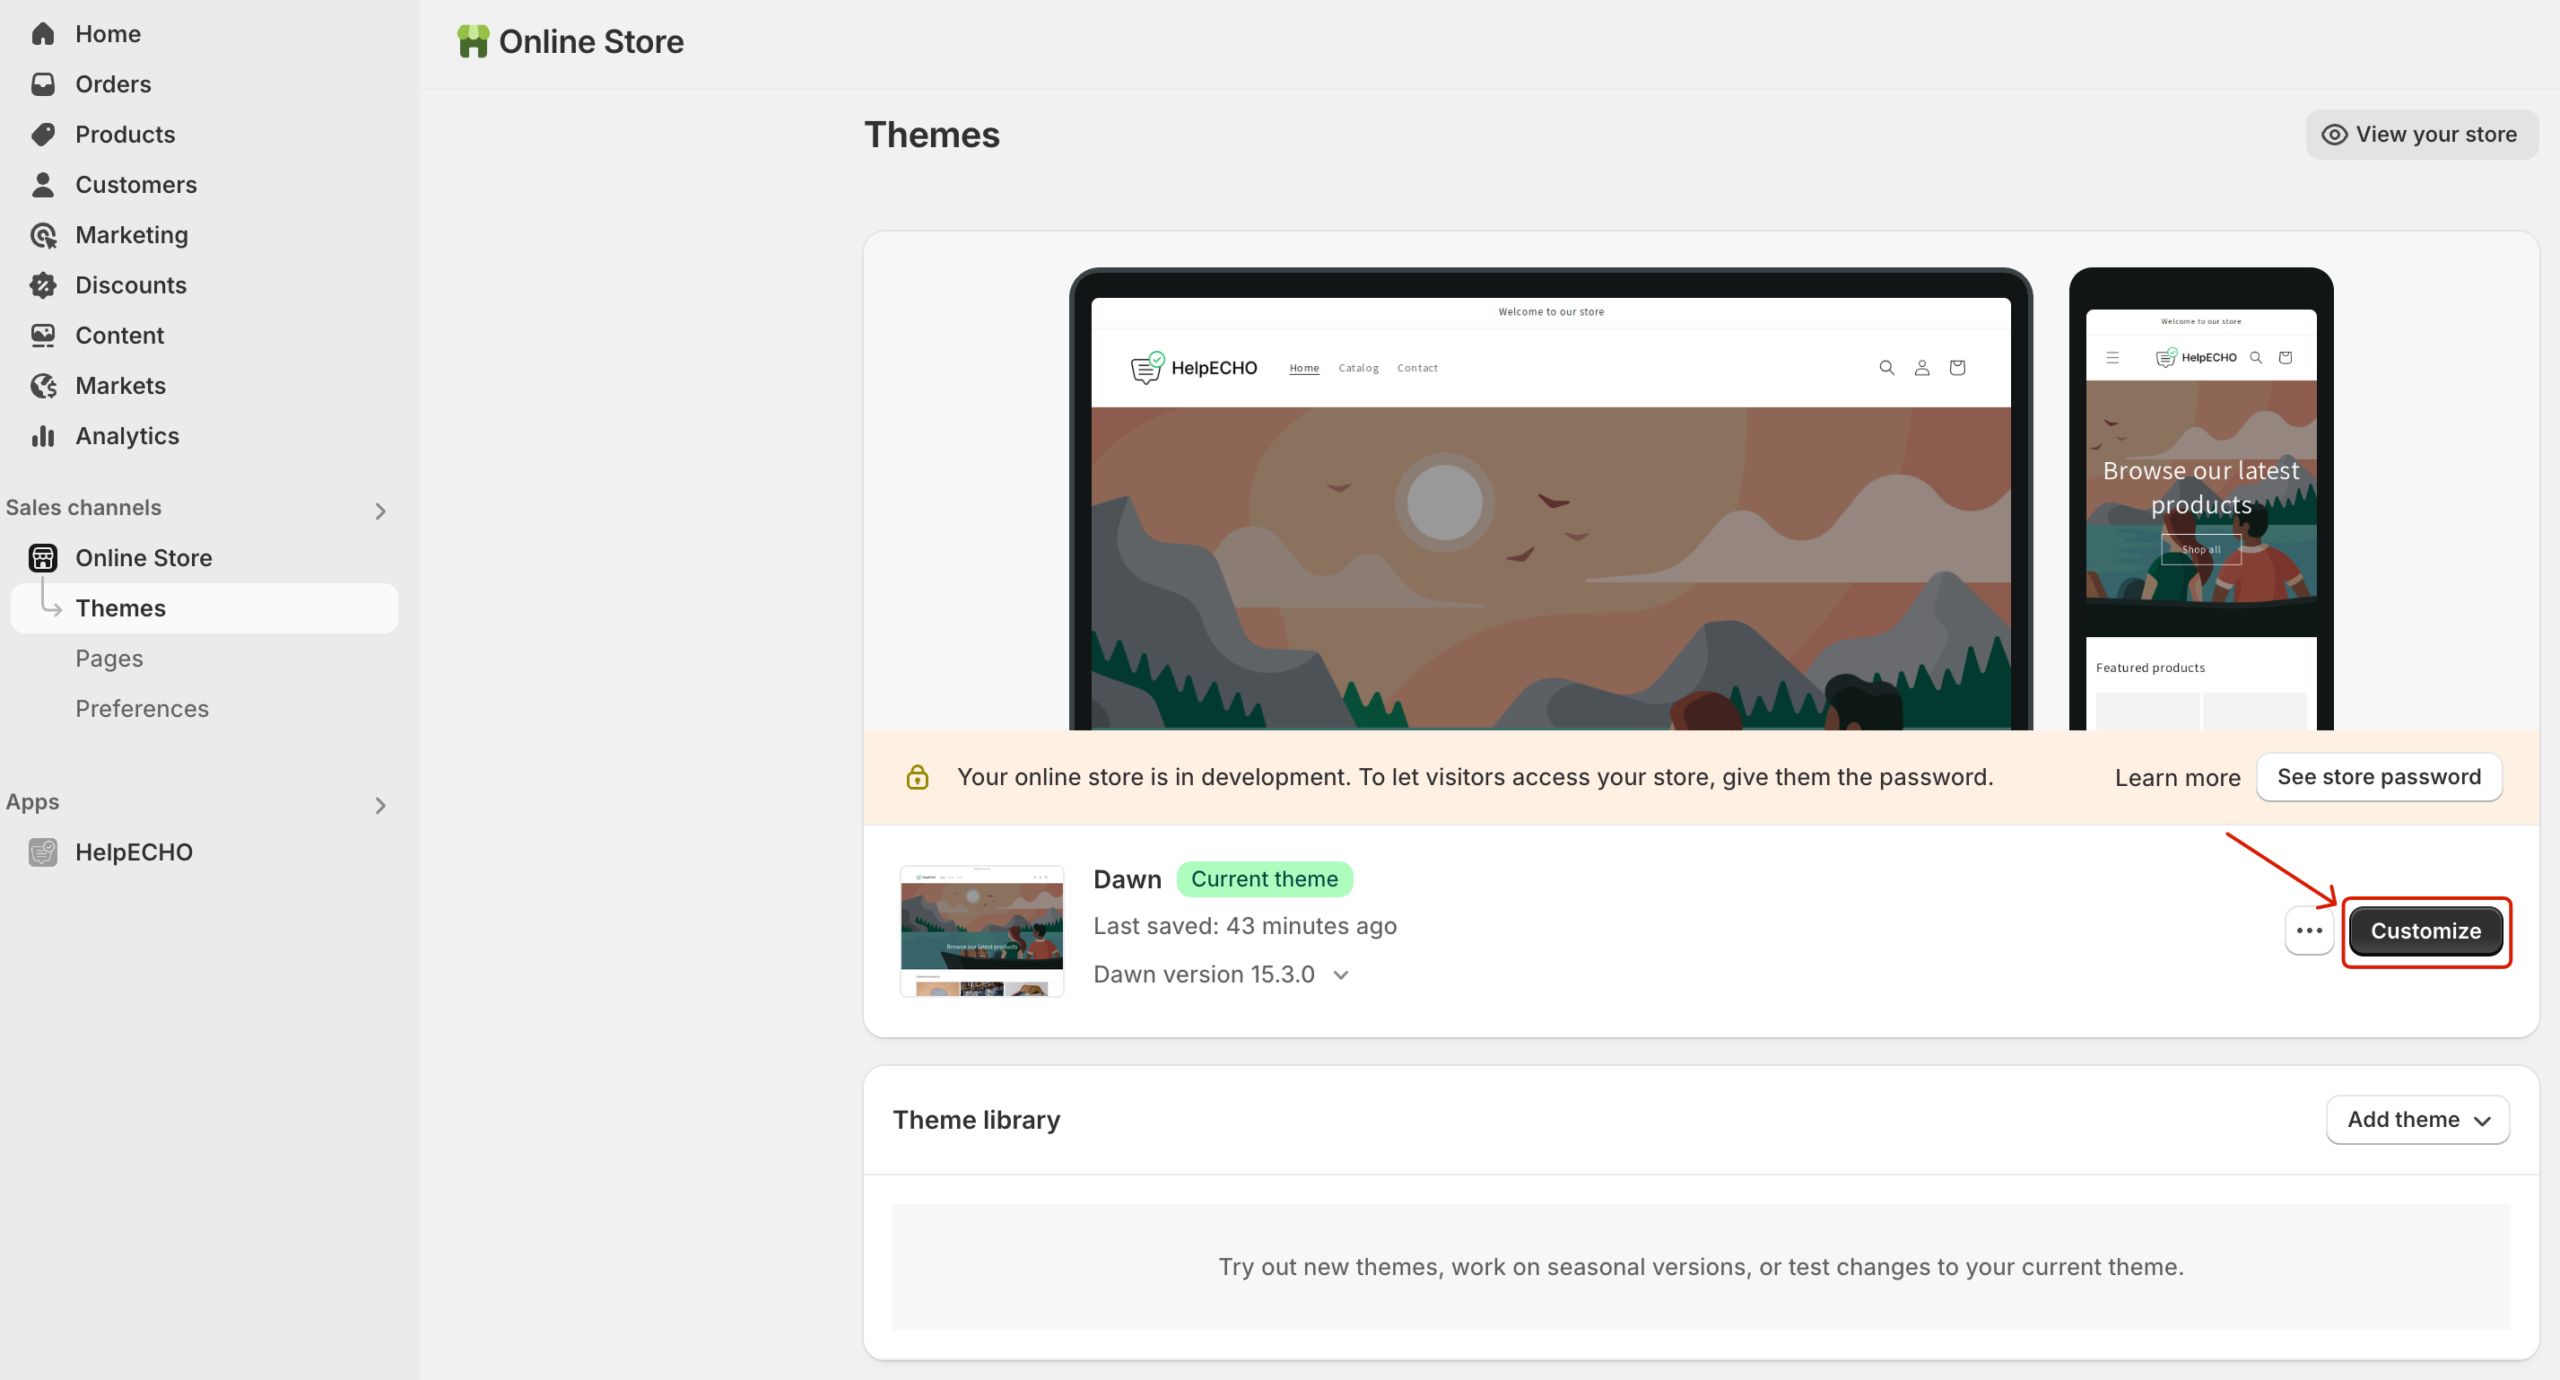
Go to Online Store > Themes and click the Customize button.
From the top dropdown menu, select Pages, then click Create template.
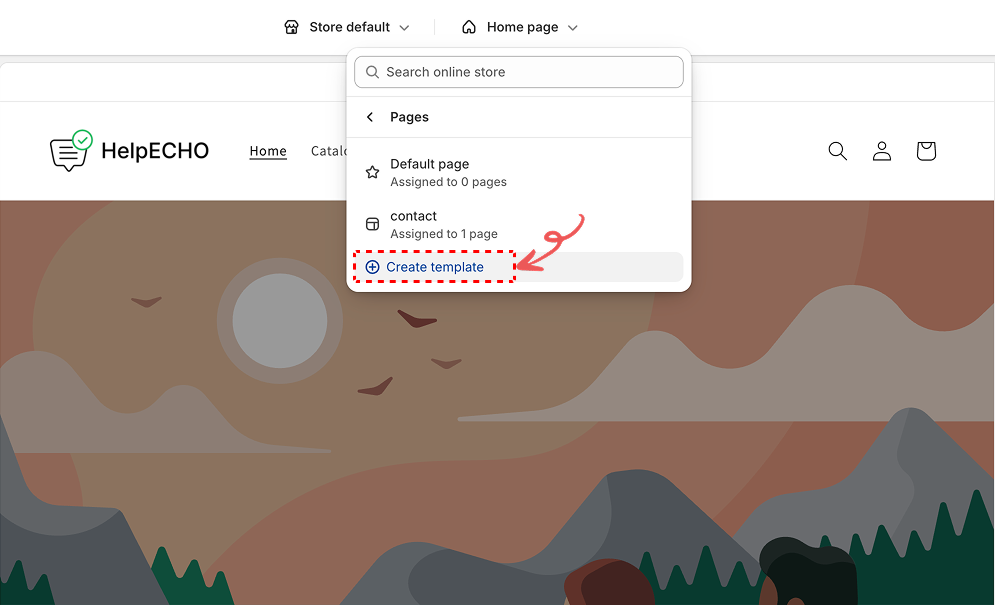
Name the new template something like support-page. You’ll use this in the next step when creating the page.
Step 2: Create a Support Page
Navigate to Online Store > Pages in your Shopify admin. Then click the Add page button.
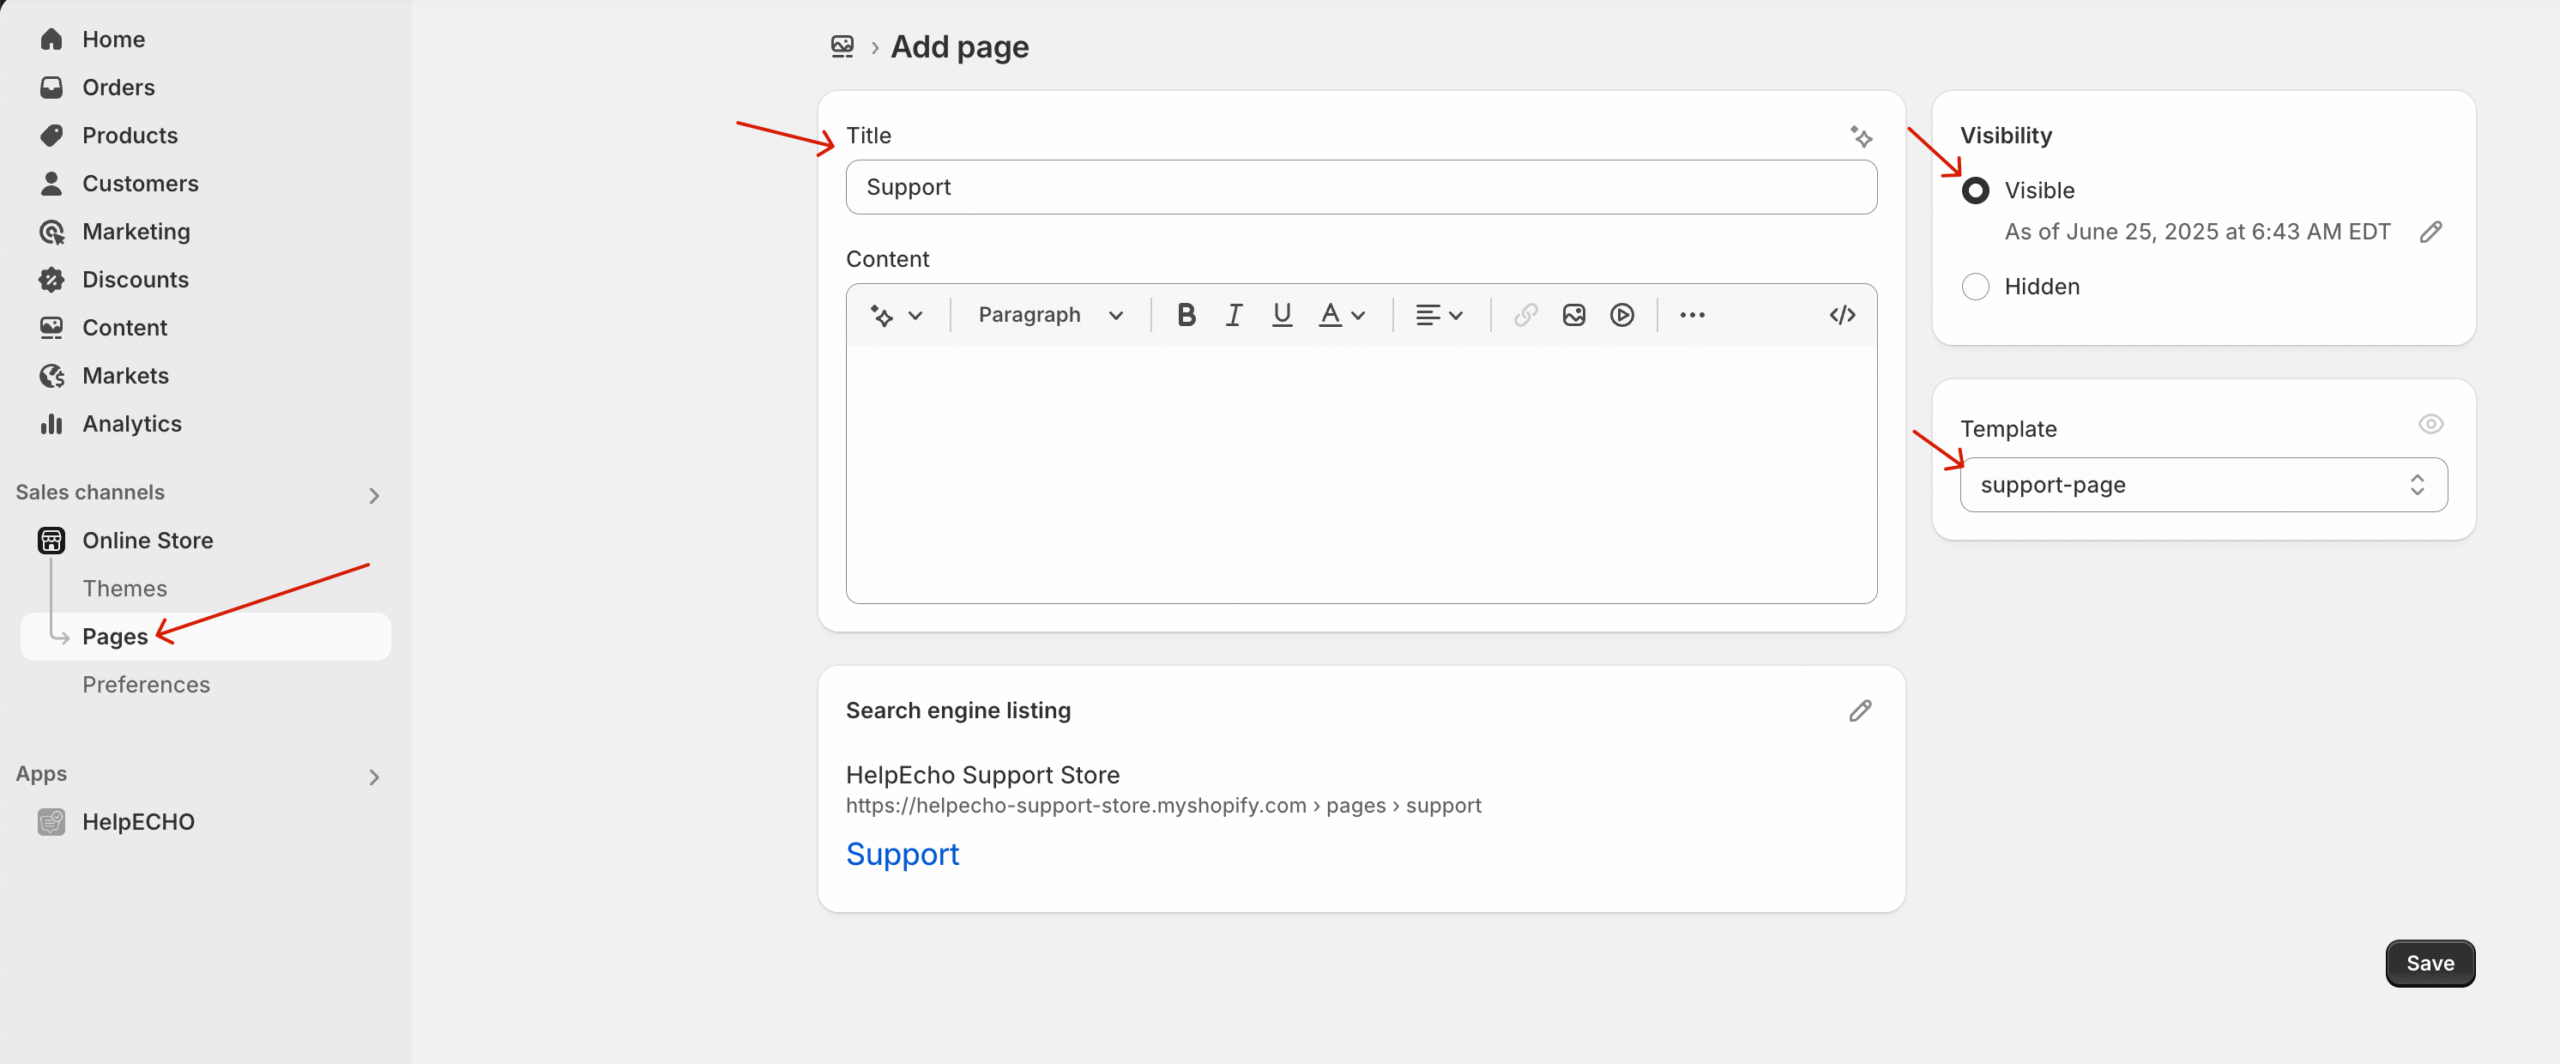
- Set the Title to something like “Support”
- You can leave the Content blank
- Choose the Template:
support-page - Set the Visibility to Visible
- Save the page
Step 3: Customize the Theme and Add HelpEcho Block
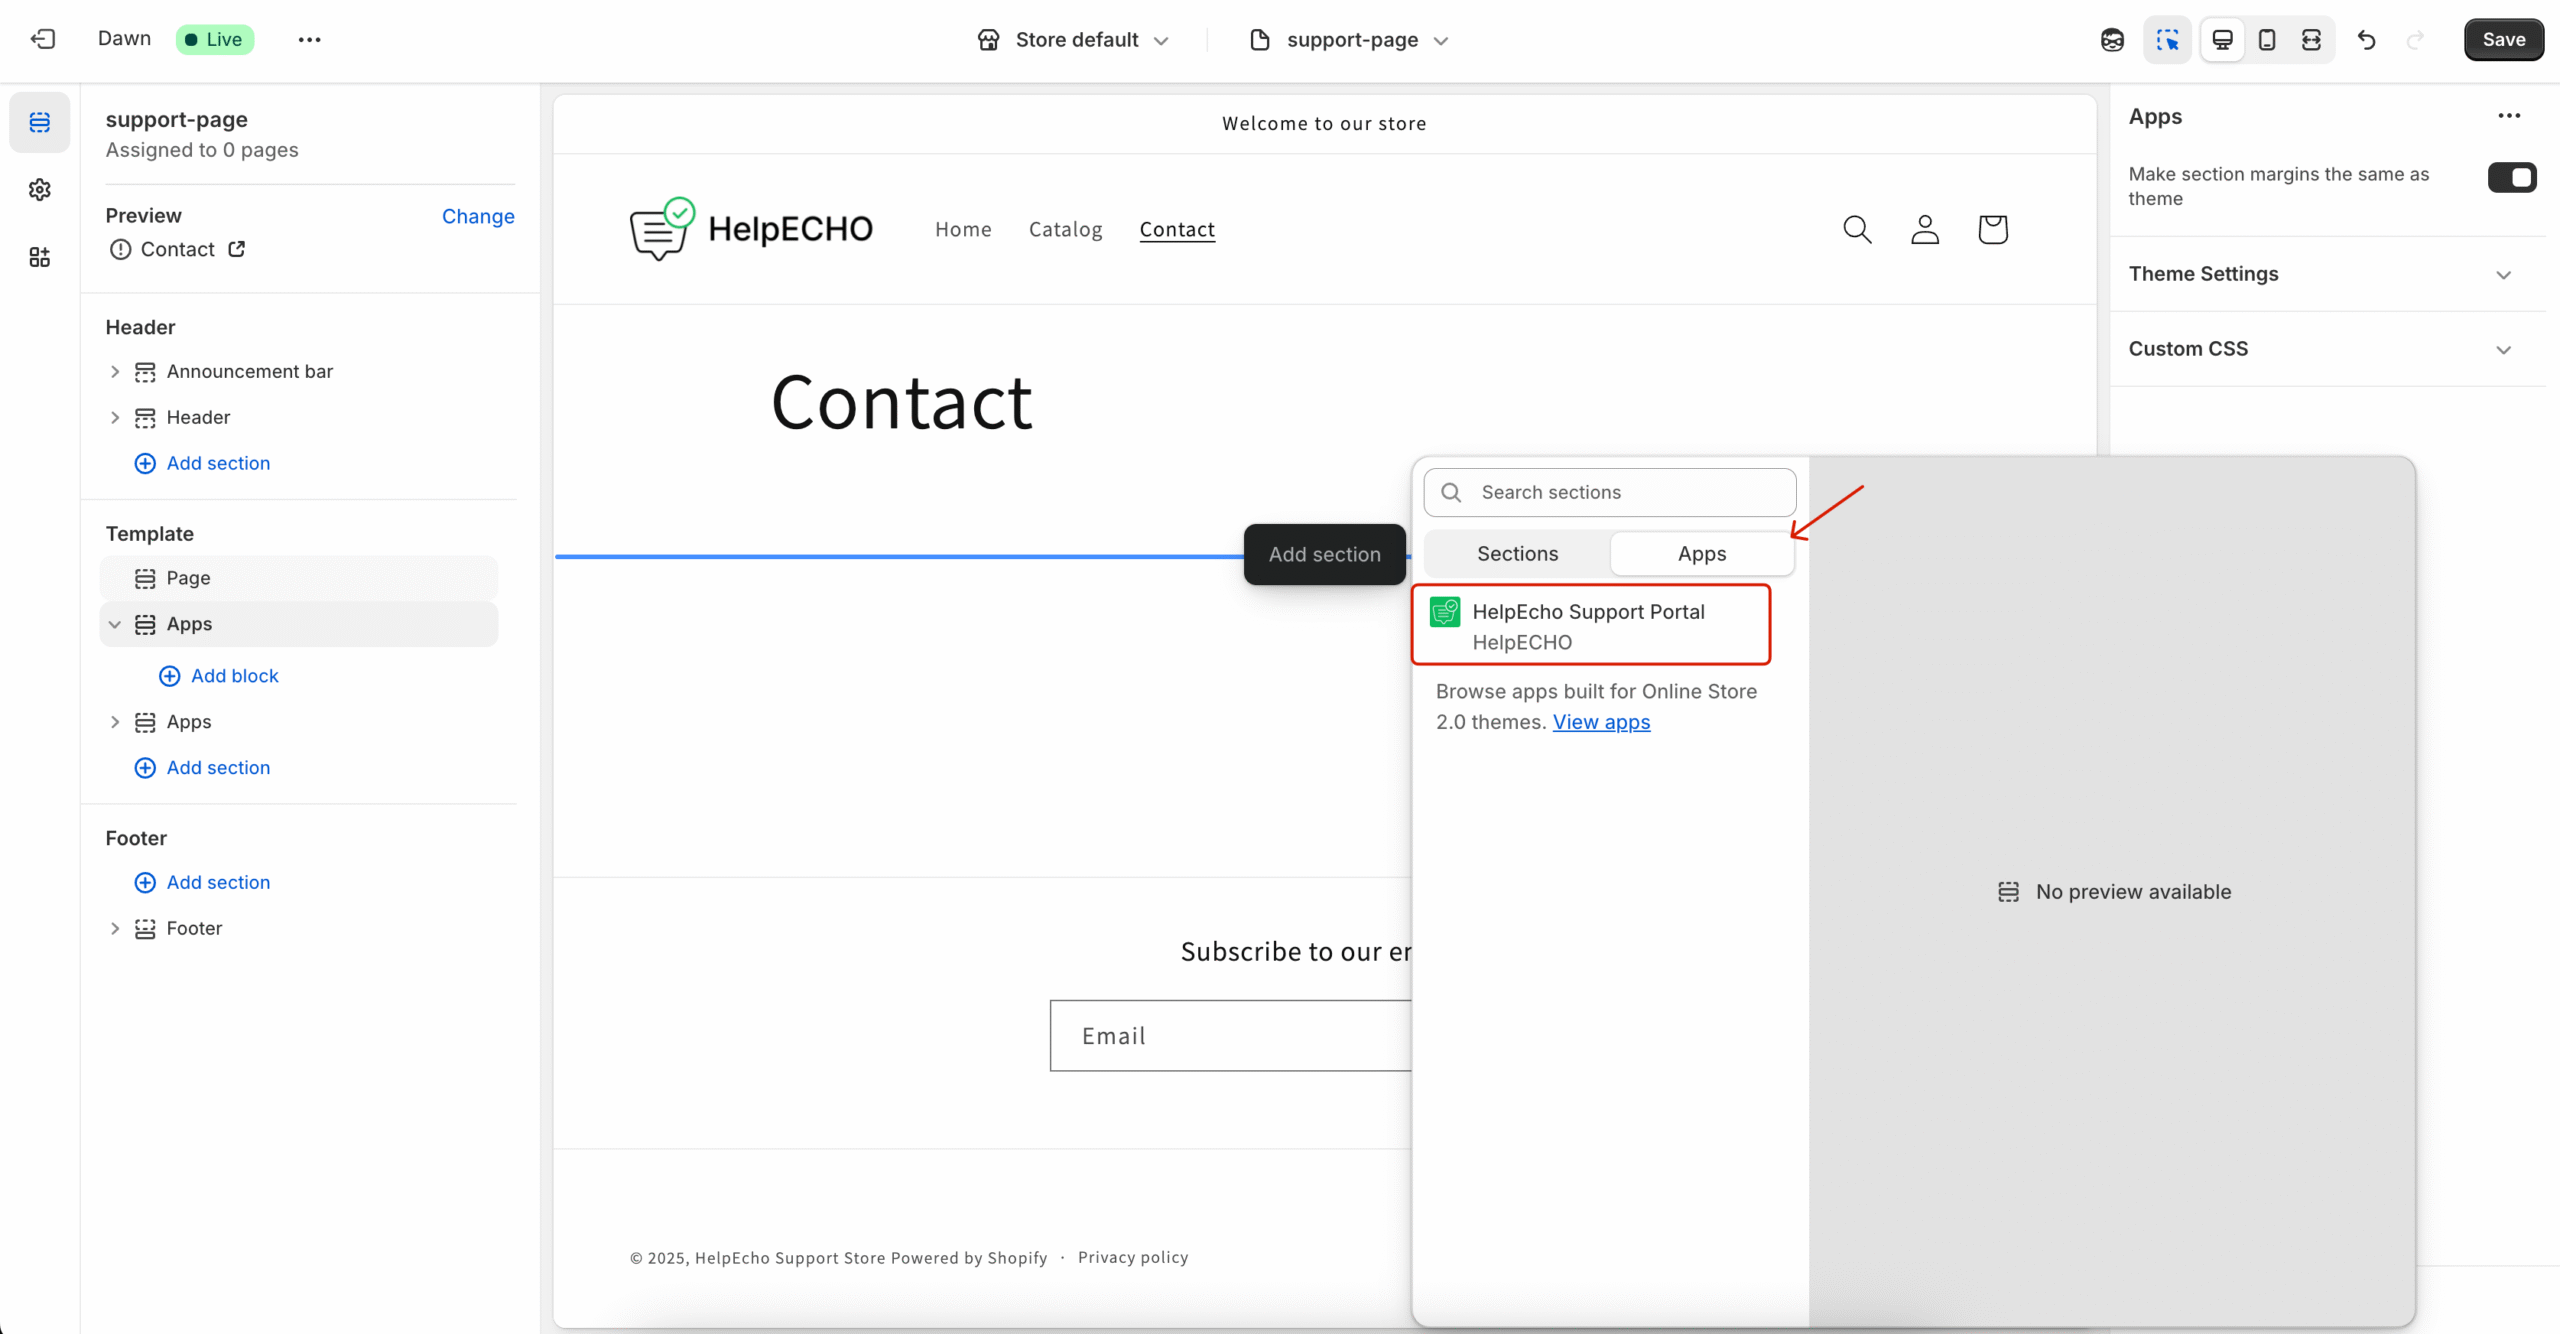
Now go to Online Store > Themes and click the Customize button.
In the template selector, choose the support-page template you created and assigned.
Next, click Add section, go to the Apps tab, and choose HelpEcho Support Portal. The login form will appear on the page.
Click Save to apply the changes.
Step 4: Add the Page to Main Menu
To make the support page accessible from your storefront, go to Online Store > Navigation > Main menu, and click Add menu item.
- Label:
Support - Link: Select the support page you just created
- Click Save
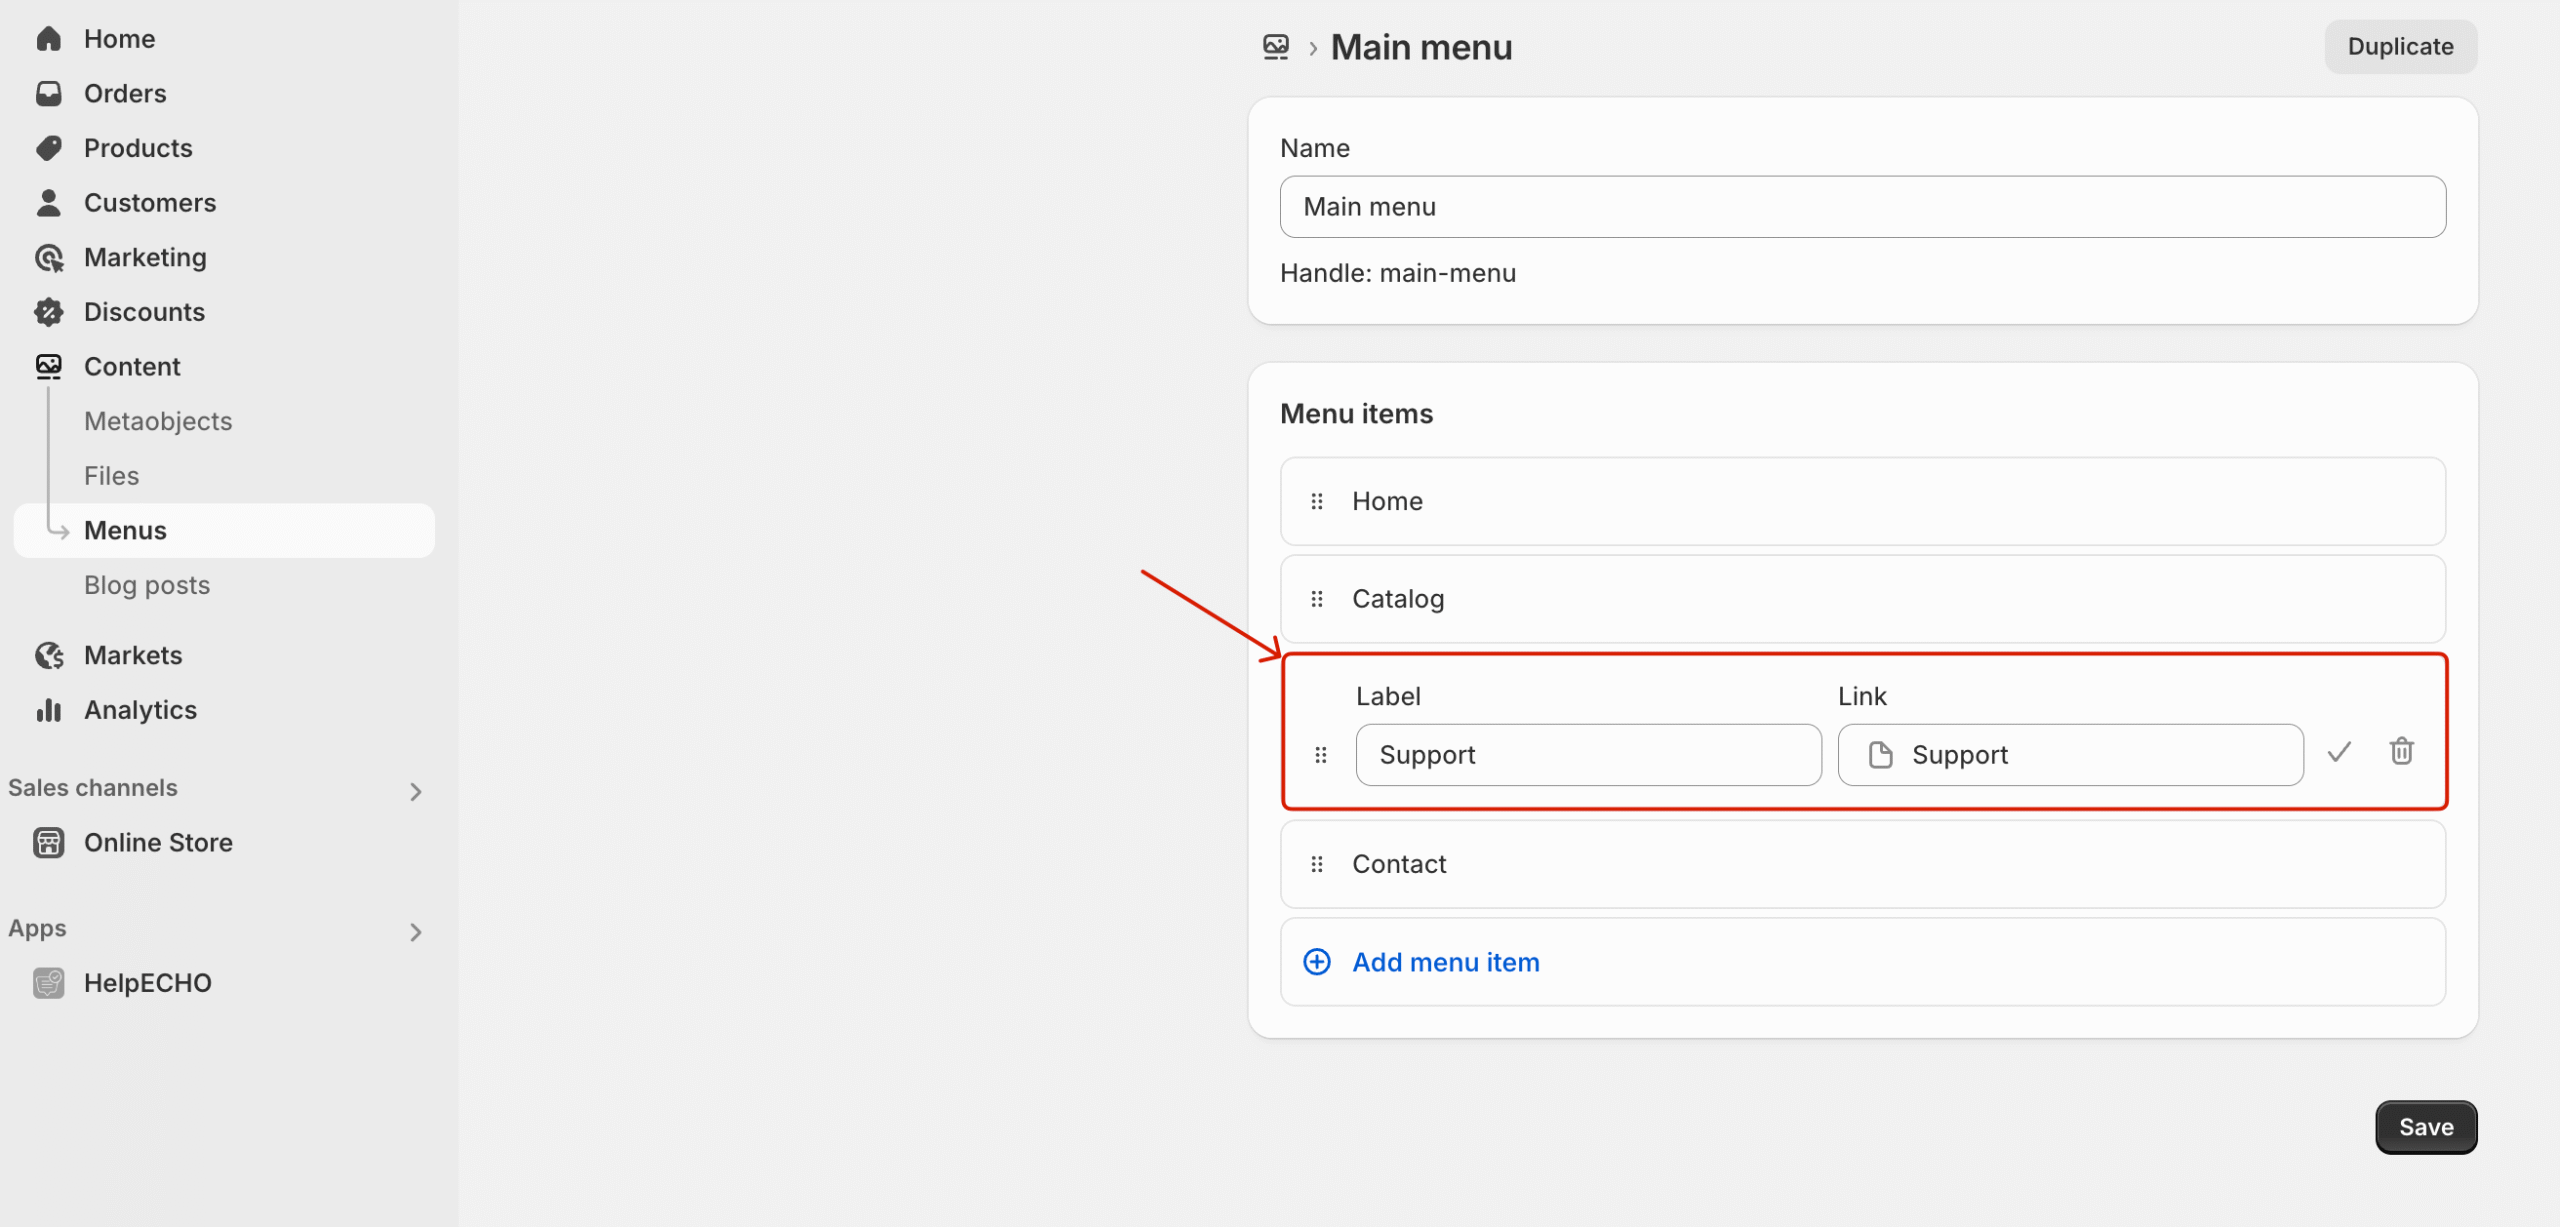
Now customers will see the Support page in your storefront’s main navigation menu.
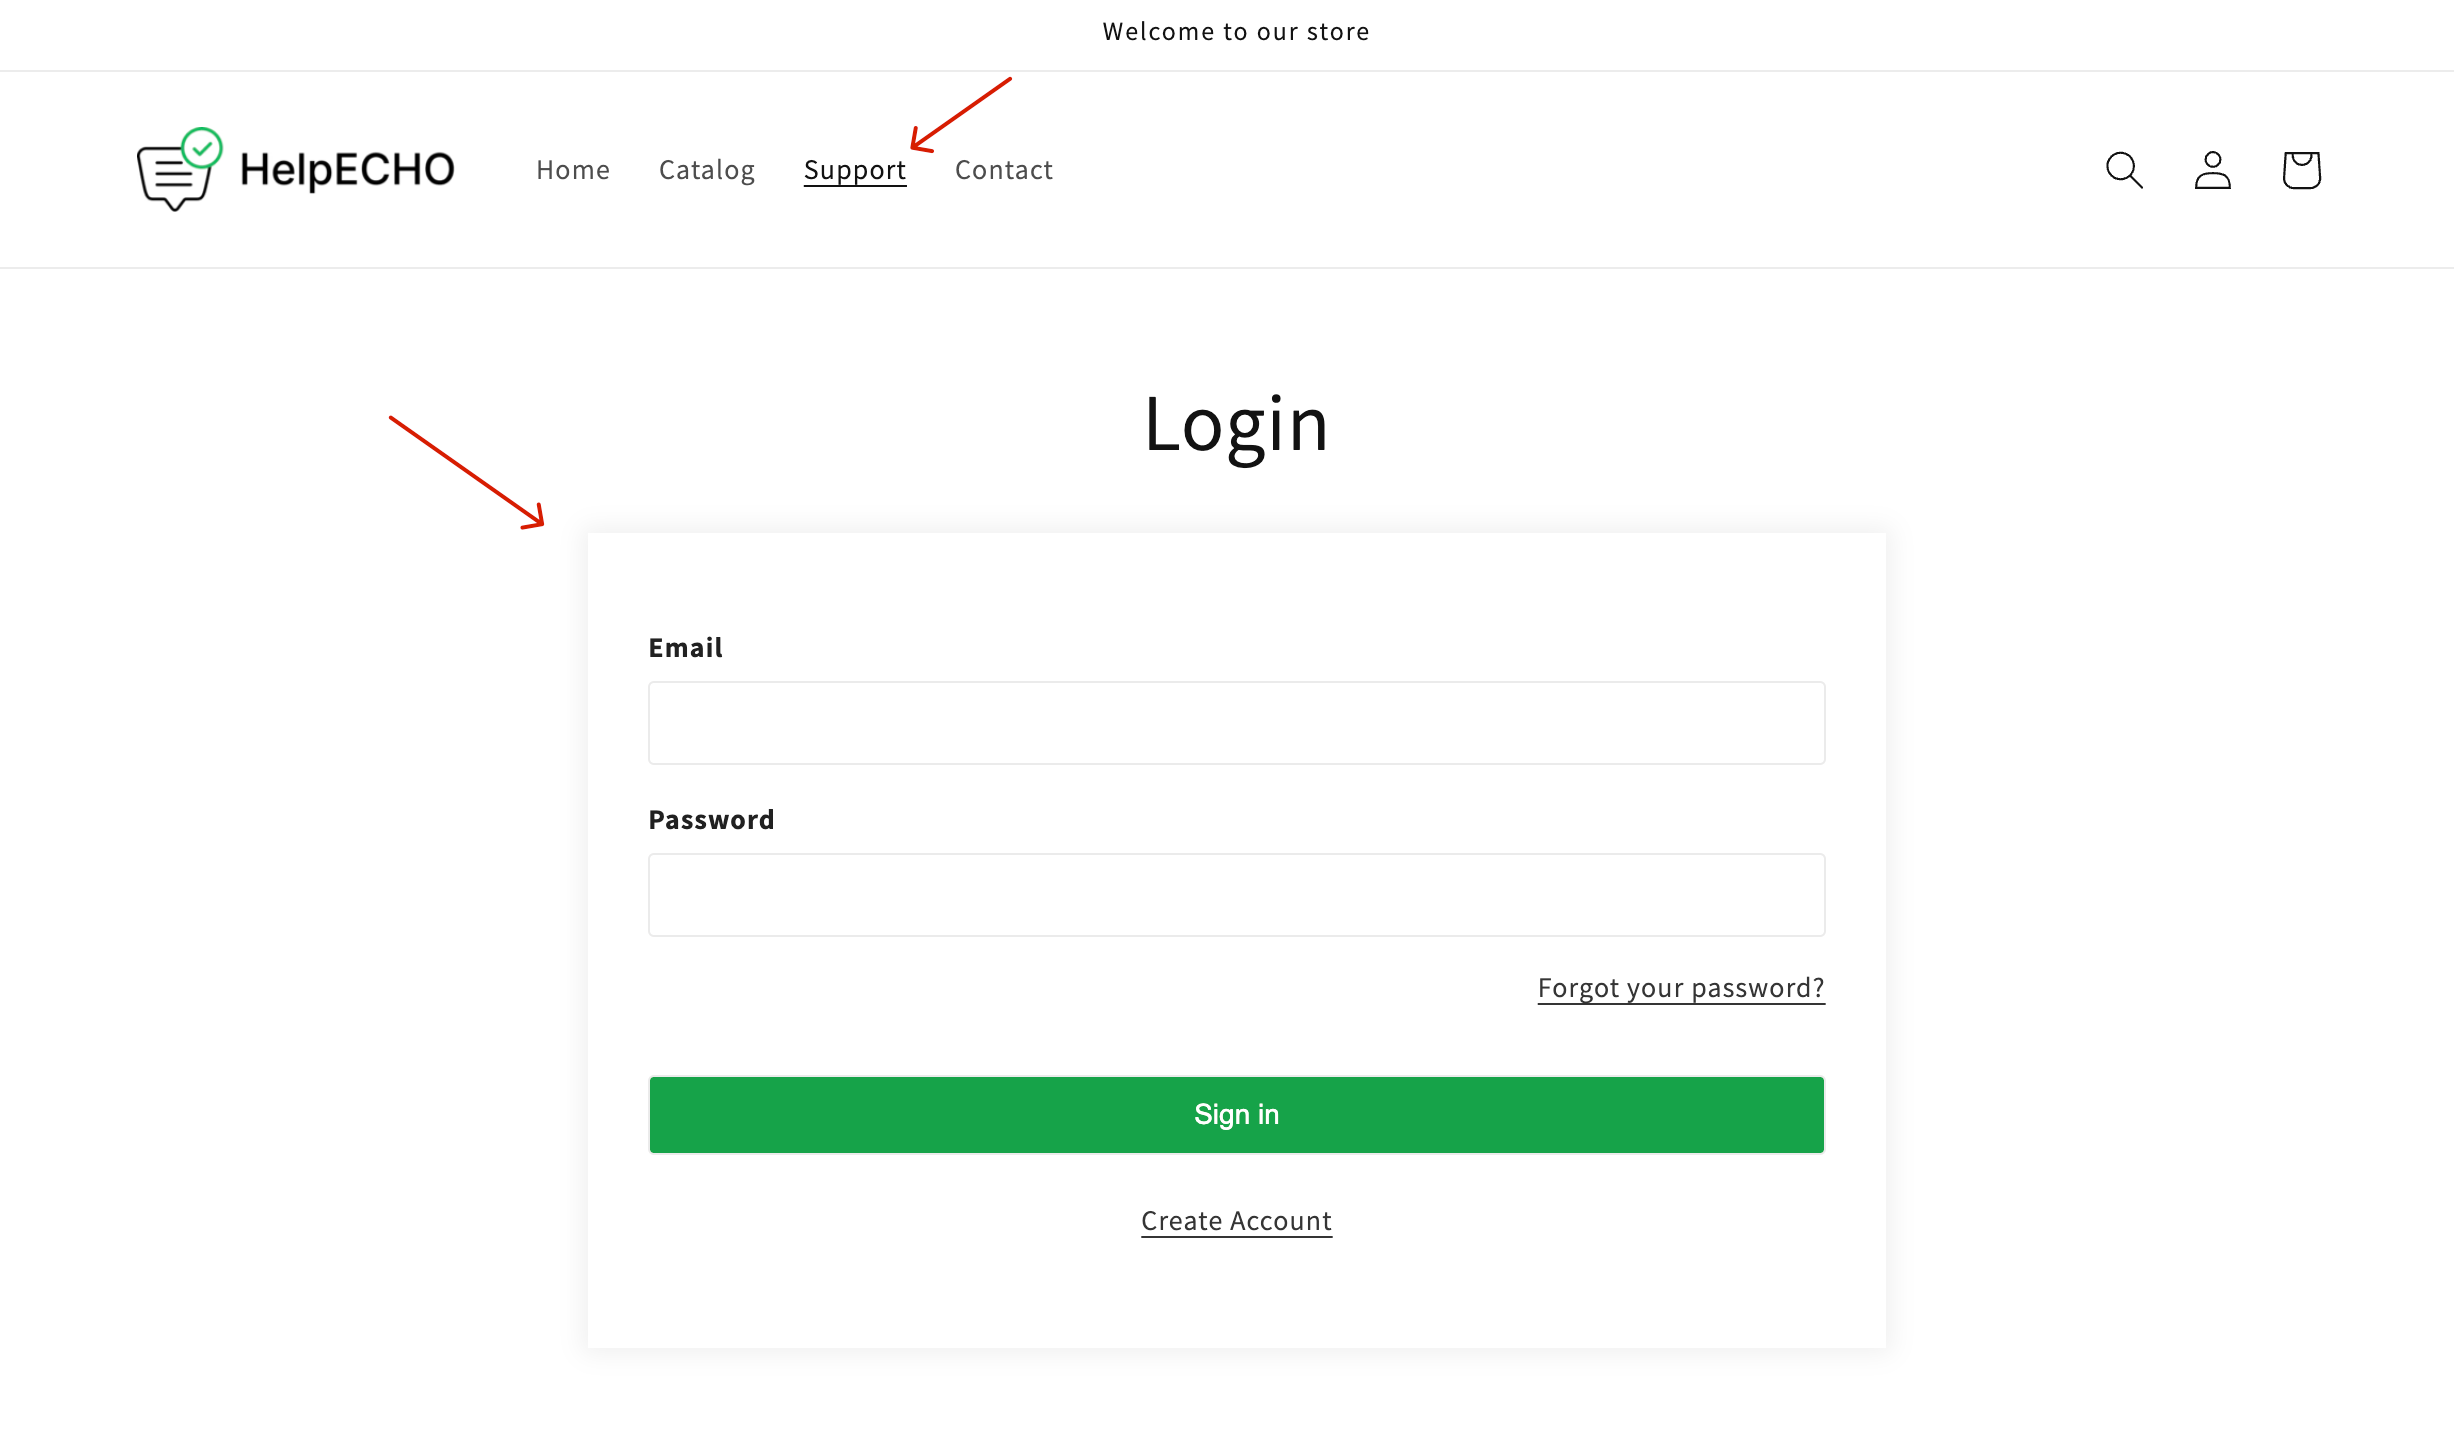
Step 5: Customer Login and Registration
When visiting the support page:
- Existing users can log in with their credentials
- New users can click Create Account to register
Step 6: Support Ticket Dashboard (Customer View)
After logging in, the customer will land on their ticket dashboard. Here, they can:
- View ticket list (All, Open, Closed)
- Click Create Ticket to open a new ticket

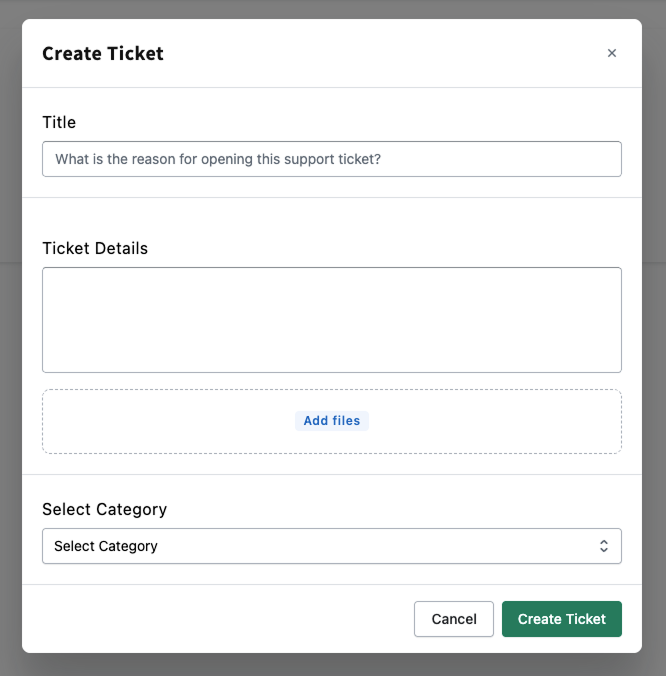
Step 7: Create a New Ticket
Clicking Create Ticket opens a form with the following fields:
- Title – reason for the ticket
- Ticket Details – explanation or message
- File Upload (optional)
- Select Category – choose from available ticket categories
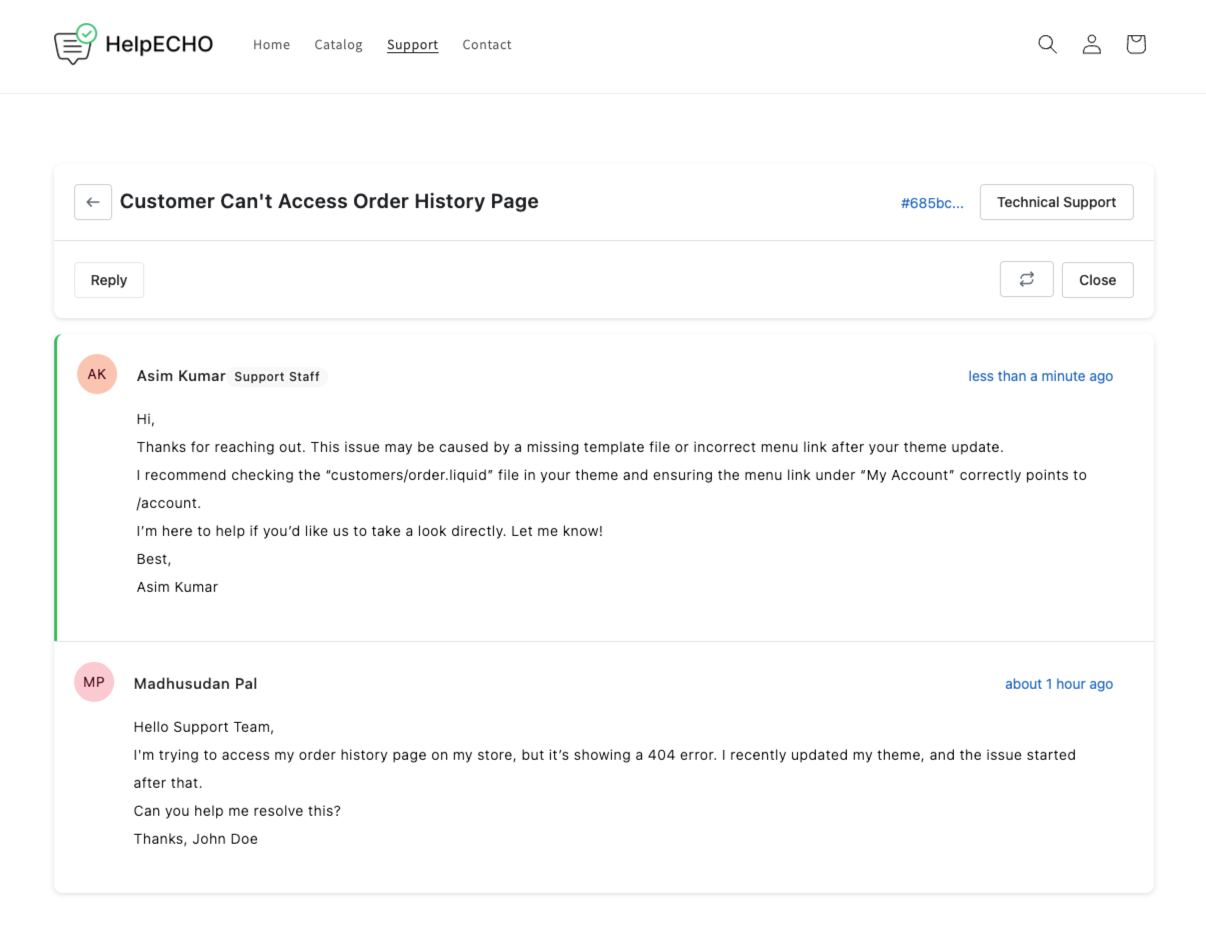
Step 8: Ticket Details Page
When clicking a specific ticket, users can:
- View their full message history
- Reply to the ticket
- Sync to refresh latest messages
- Close the ticket when resolved
This setup ensures your customers can manage their support needs seamlessly through your Shopify storefront.