HelpEcho allows your customers to manage their own support tickets directly from your storefront. Here’s how customers can create, filter, and reply to support tickets using the HelpEcho app embedded on your Shopify support page.
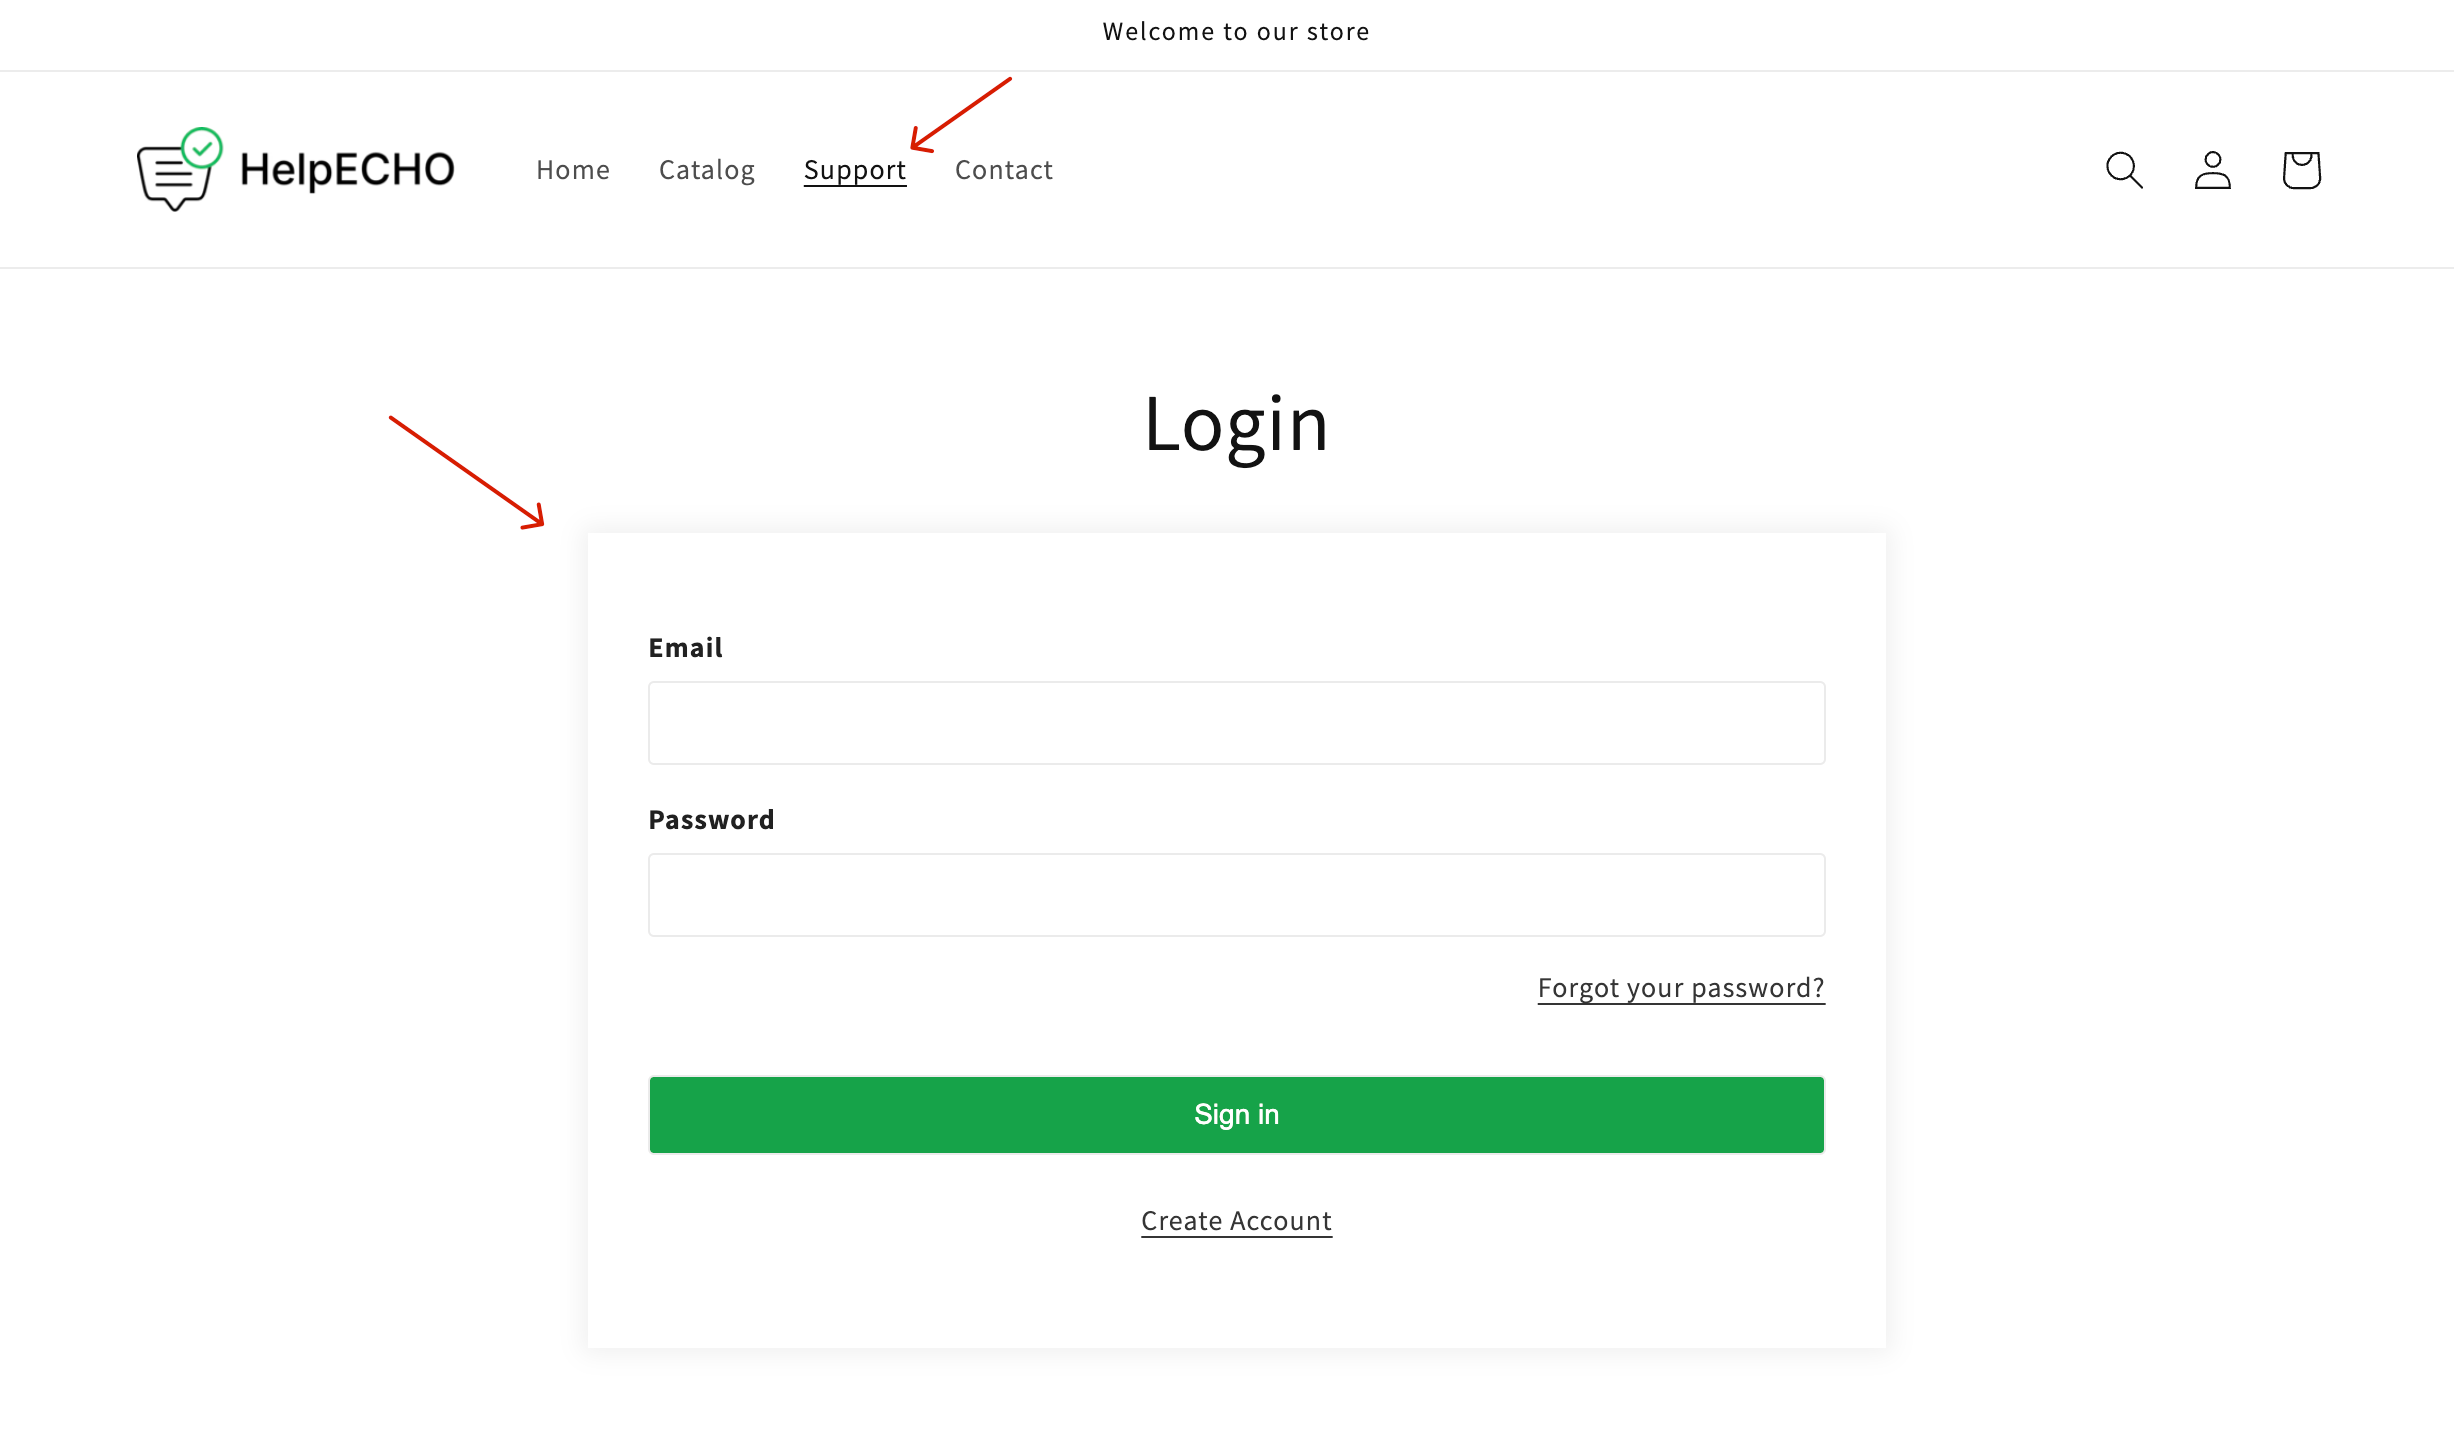
Step 1: Customer Login or Account Creation
To access the support ticket system:
- Existing customers can log in using their email and password.
- New customers can register by clicking Create Account on the support page.
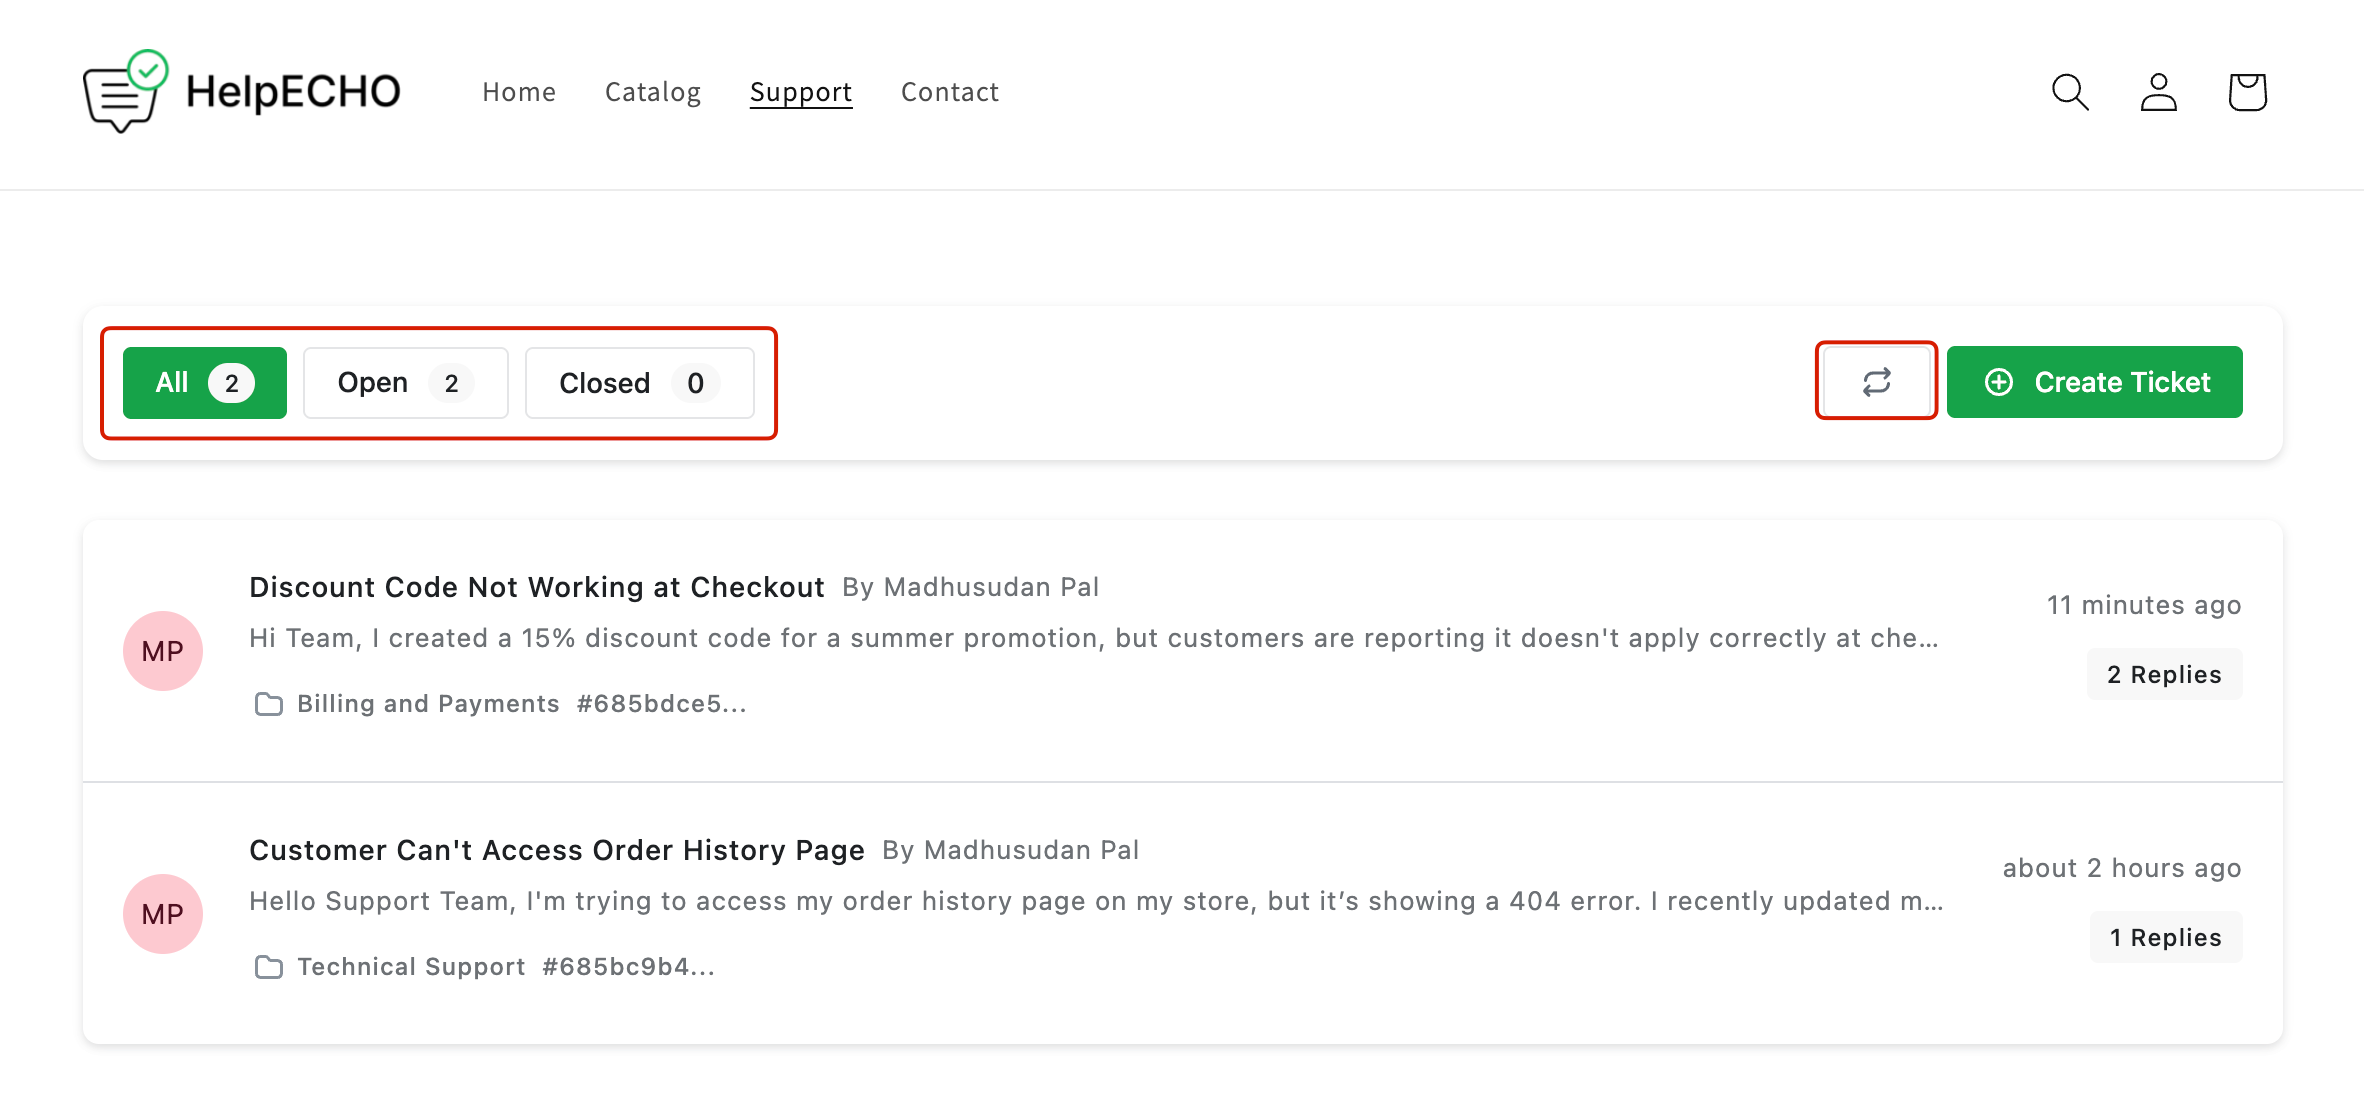
Step 2: View the Customer Support Dashboard
Once logged in, customers will see their Support Dashboard. They can:
- View All, Open, or Closed tickets
- Click Create Ticket to submit a new issue
- Use the Refresh button to update their ticket list
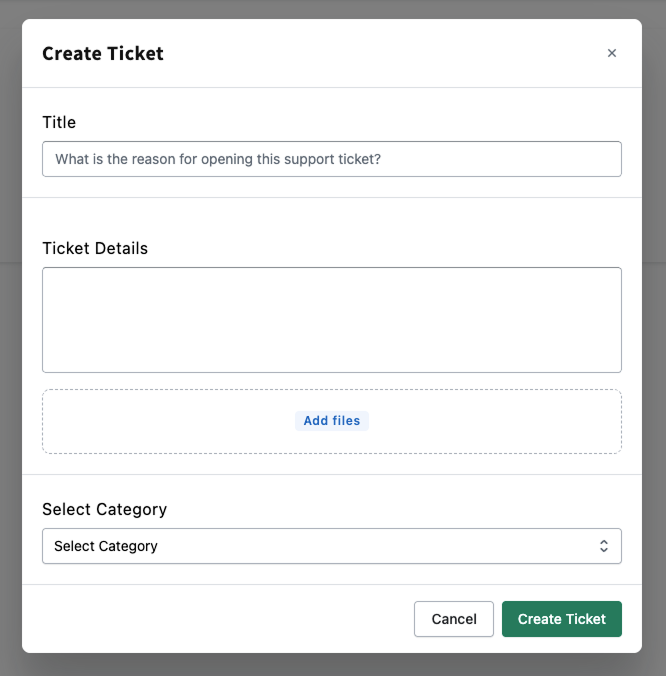
Step 3: Create a New Support Ticket
Clicking the Create Ticket button opens a popup form. Customers need to:
- Enter a Title for the issue
- Provide detailed information under Ticket Details
- Optionally, upload attachments
- Choose a Category (e.g., Technical Support, Billing, etc.)
- Click Create Ticket
Step 4: Ticket Listing & Filters
After submitting a ticket, it appears in the support dashboard. Customers can:
- Filter by Open or Closed tickets
- View the number of Replies
- Click to view ticket details
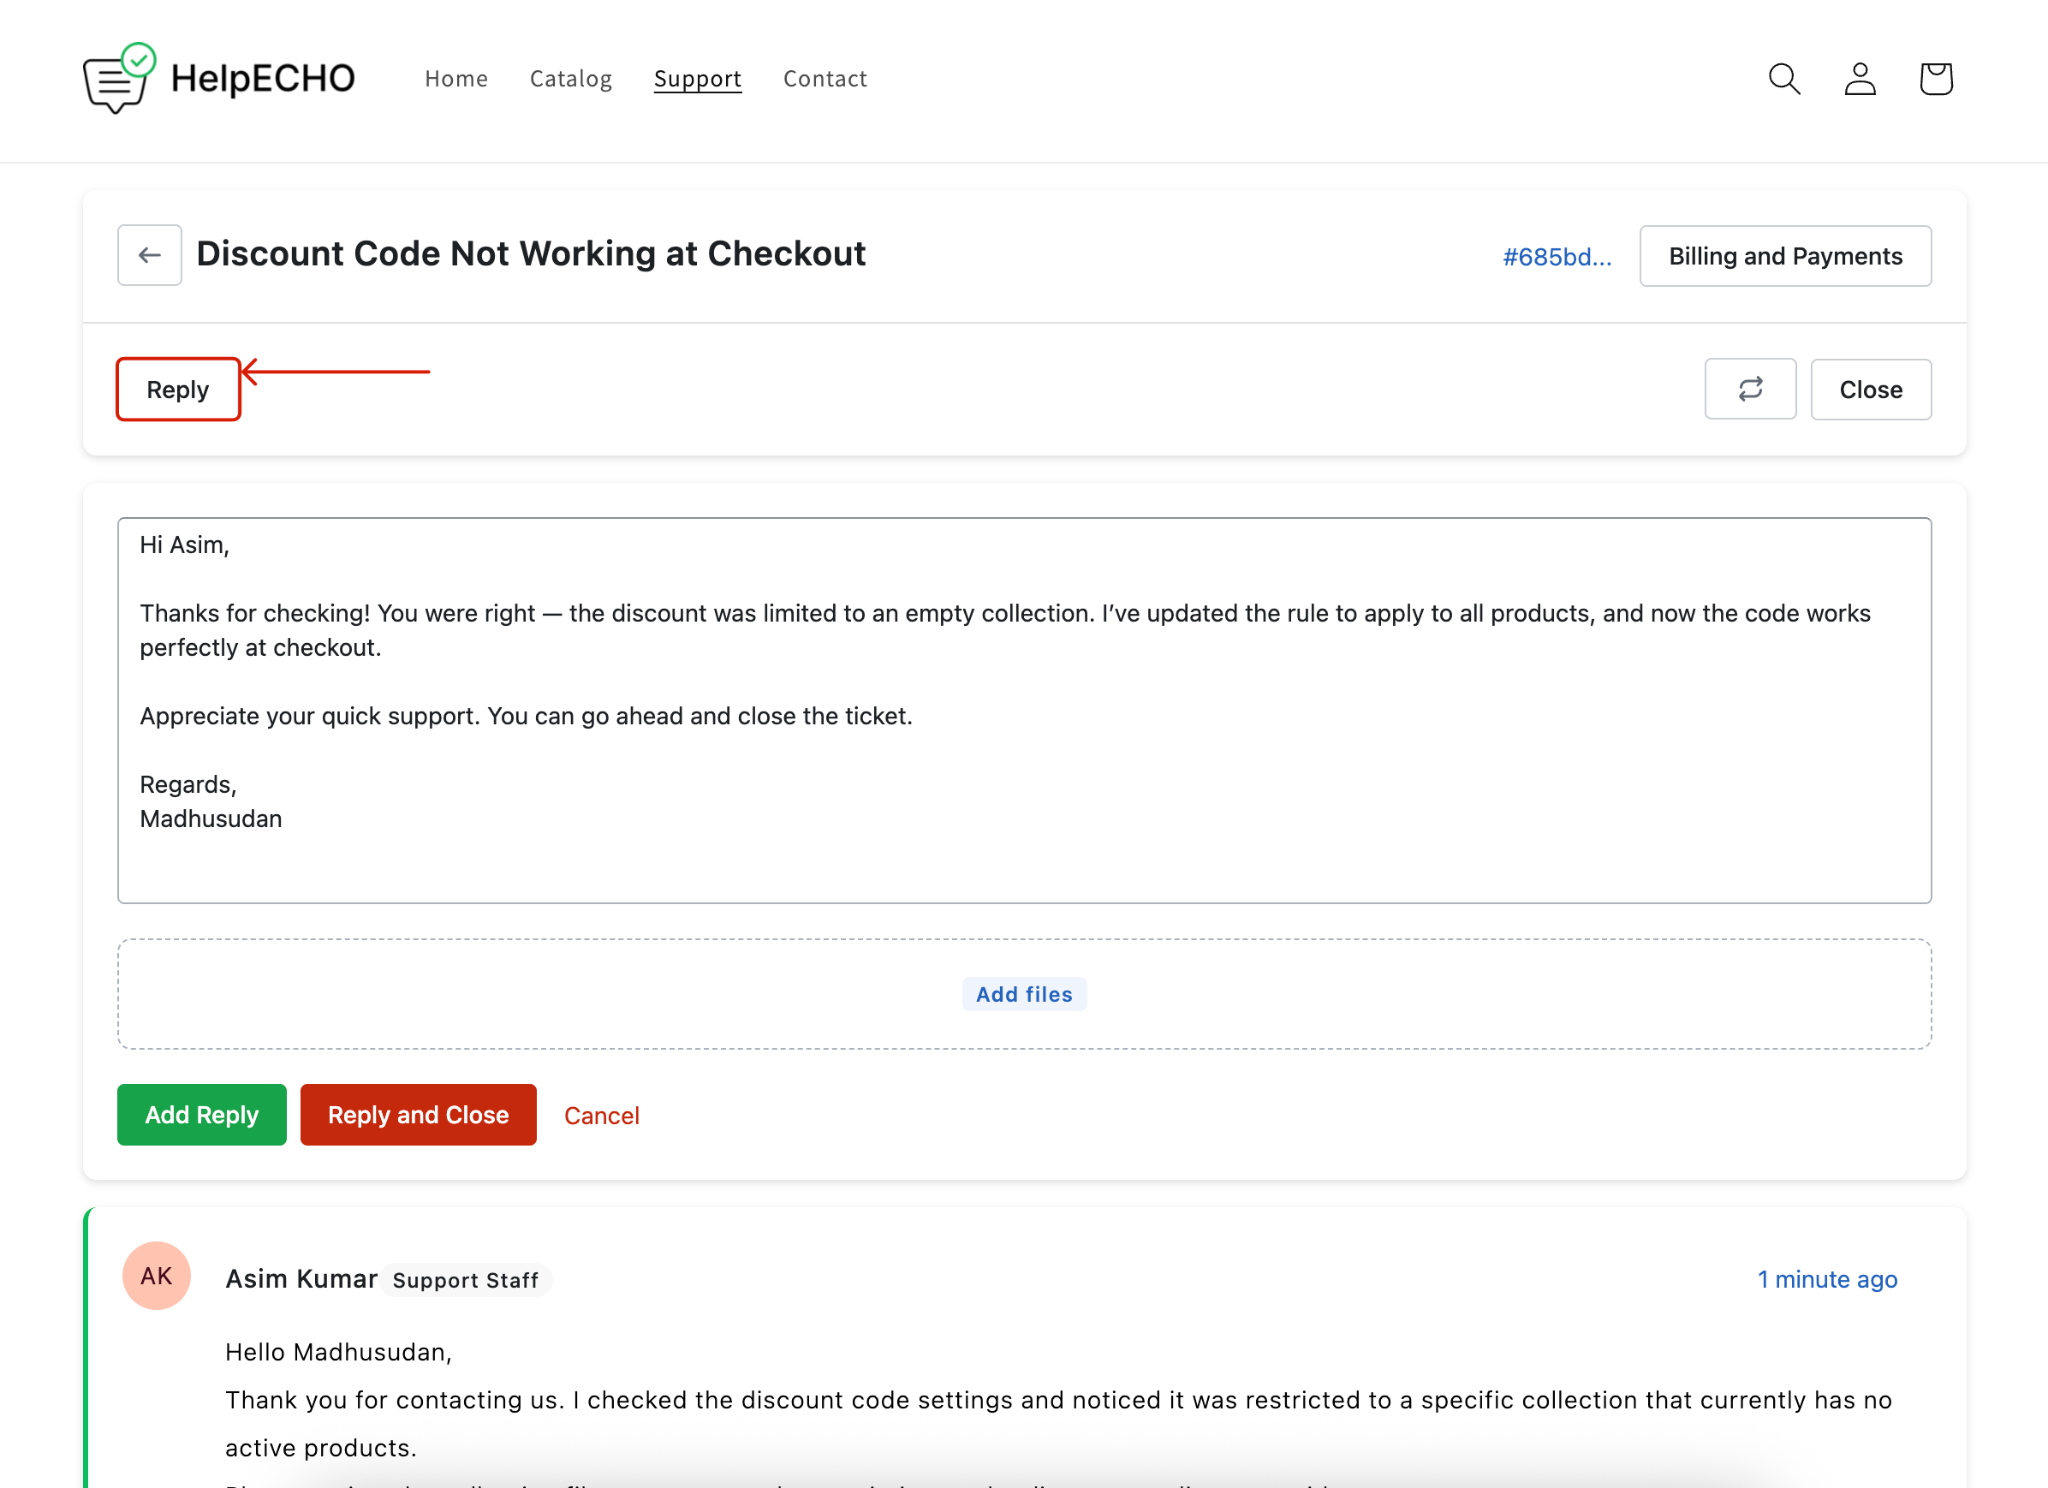
Step 5: Reply to or Close a Ticket
On the ticket details page, users can:
- View the full conversation history
- Use the Reply box to respond
- Click Reply and Close to respond and close the ticket
- Upload additional files if needed
Last updated on June 29, 2025