HelpEcho allows you to automate customer support tasks using workflows. This feature ensures faster response times and less manual work for your support team. When you install the app, two sample workflows are created by default, but they are inactive. You can either activate and modify them or create new workflows based on your store’s needs.
This documentation gives a quick overview of how to create and configure workflows. A more detailed version will be published later.
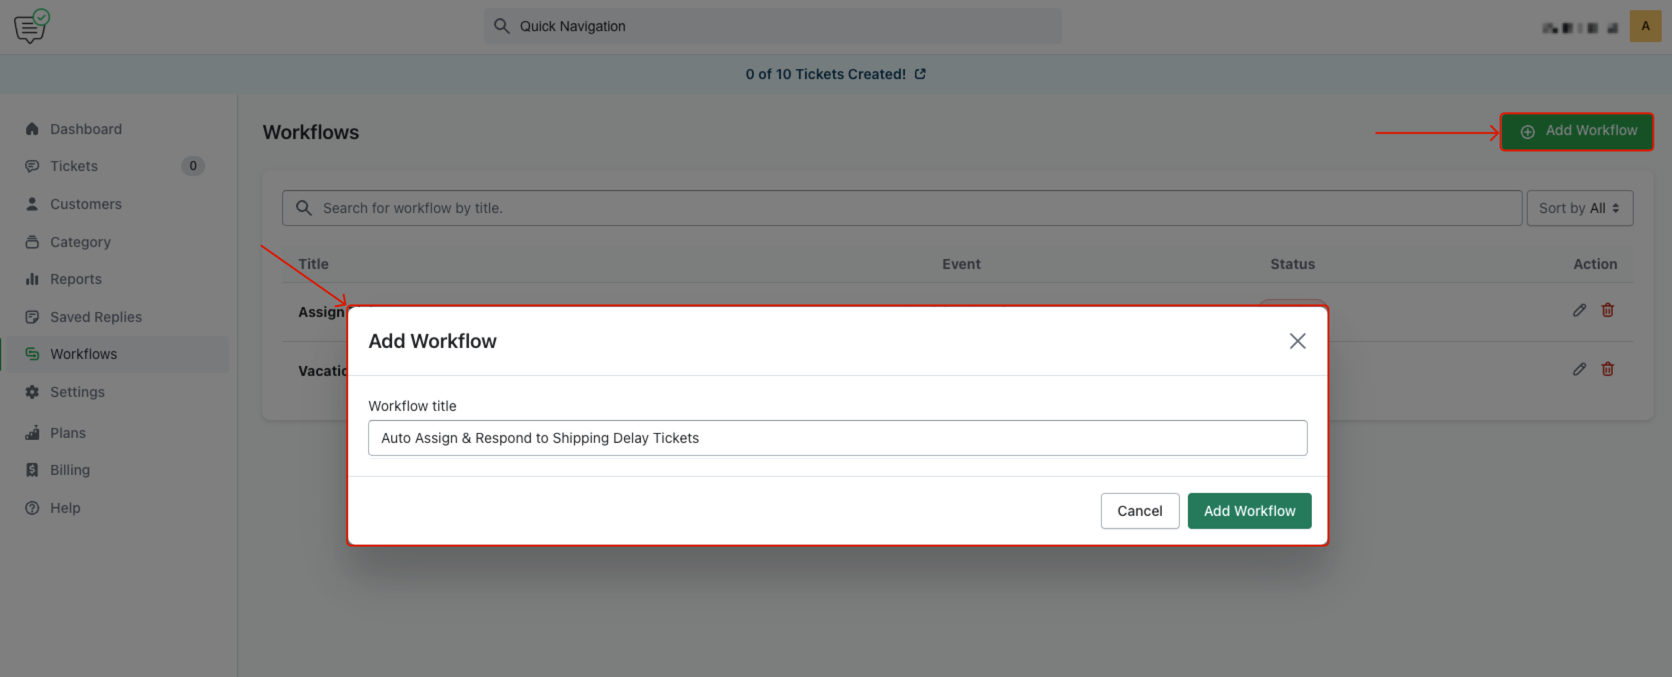
Step 1: Create a New Workflow
- Go to Workflows from the left sidebar.
- Click the Add Workflow button.
- Enter a title (e.g., Auto Assign & Respond to Shipping Delay Tickets).
- Click Add Workflow.
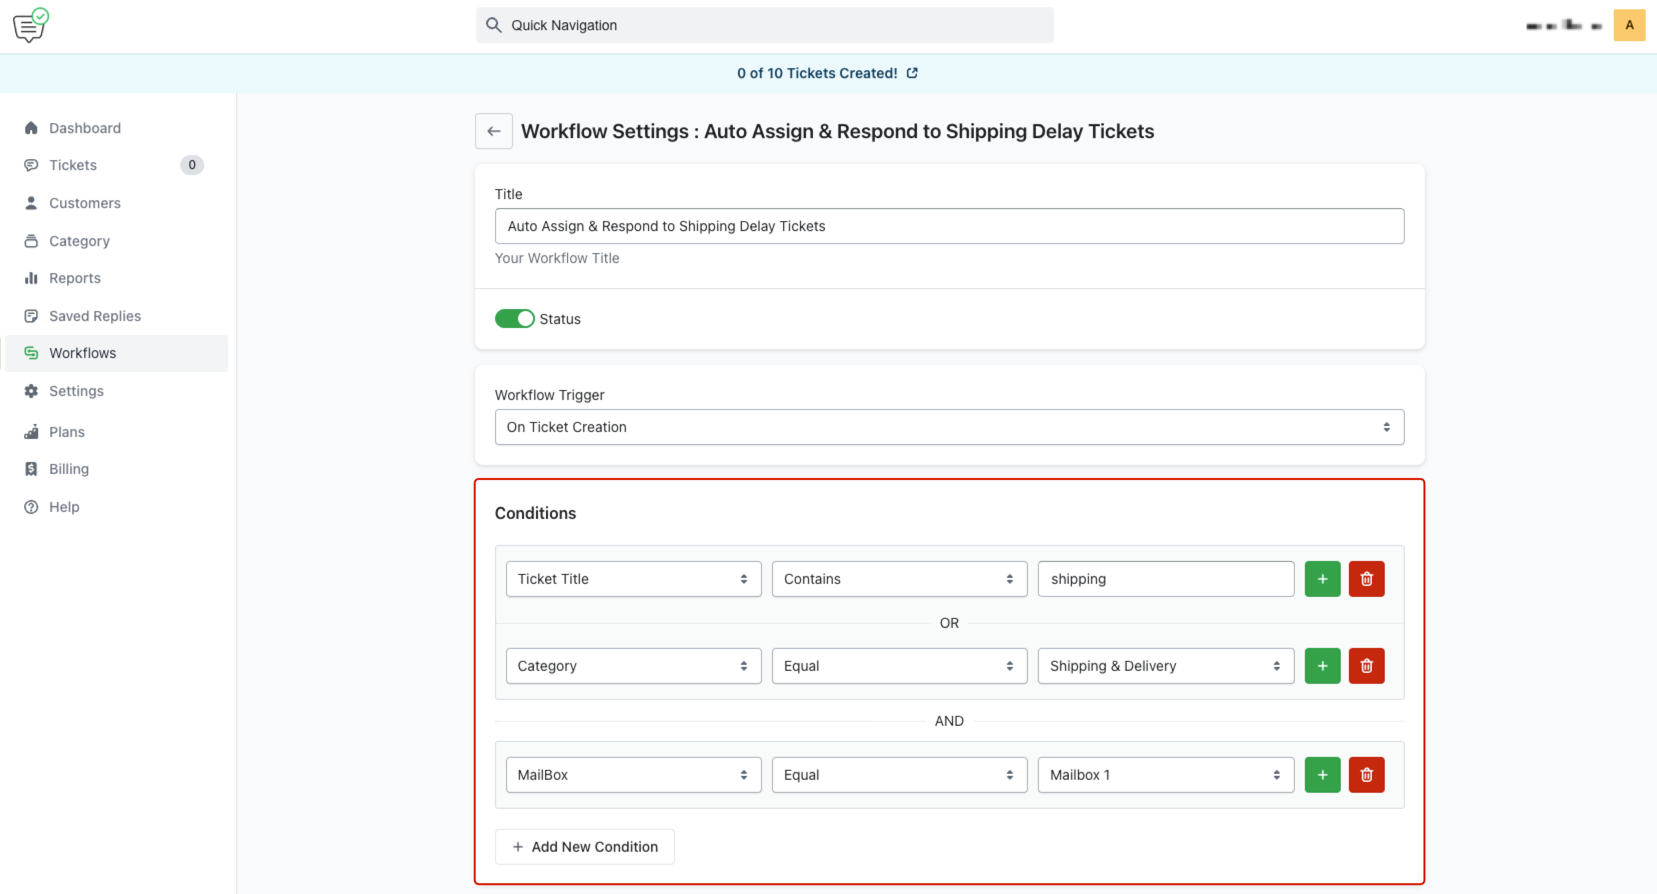
- Make sure the Status is toggled on (green) to activate the workflow.
Step 2: Set a Workflow Trigger
Choose when the workflow will be triggered:
- On Ticket Creation
- On Customer Response
- On Ticket Closed
Step 3: Define Conditions
Conditions help narrow down when the workflow should take action. Multiple conditions can be combined using AND/OR logic.
Condition Fields:
- Ticket Title
- Category
- Mailbox
Operators:
- Equal
- Not Equal
- Contains
- Not Contains
- Start With
- End With
Example Setup:
- Ticket Title → Contains → “shipping”
- OR Category → Equal → Shipping & Delivery
- AND Mailbox → Equal → Mailbox 1
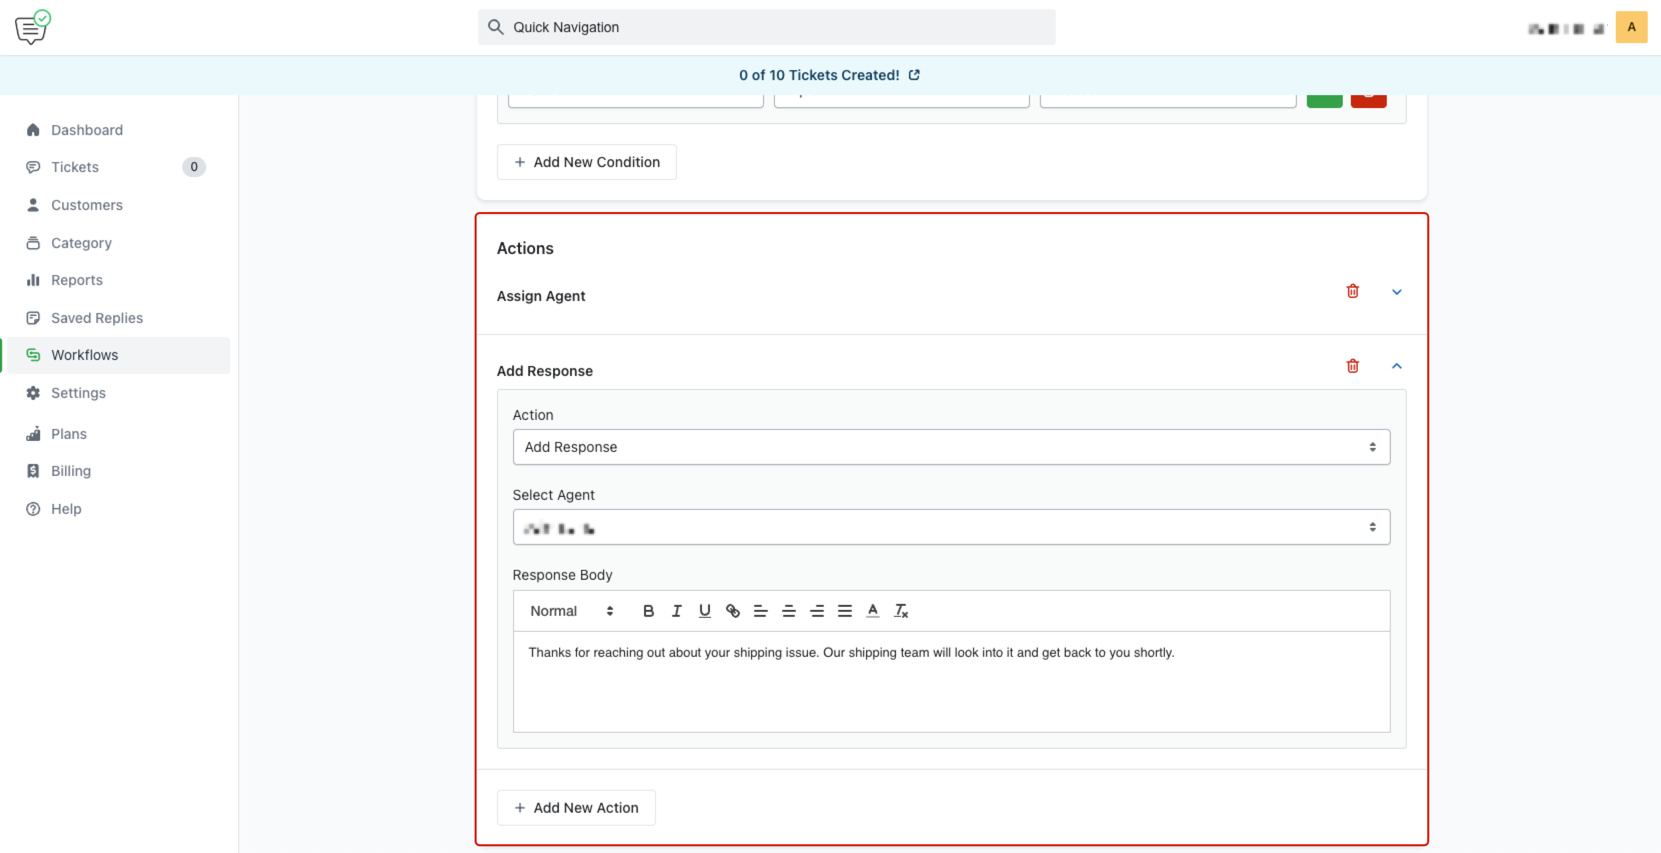
Step 4: Set Workflow Actions
Once the conditions are met, the workflow will perform specific actions.
Available Actions:
- Assign Agent → Assigns the ticket to a specific support agent (e.g., John Doe)
- Assign Category → Organizes tickets under relevant categories
- Add Response → Sends an automated message to the customer